Morphology of the face: a cheat sheet for permanent makeup artists
What do you need to know?
The first step in any successful micropigmentation procedure is a proper assessment of the face. To be able to do this in the most accurate way, the PM master must be familiar with the basic concept of facial morphology.
An experienced permanent makeup master will be able to make the perfect face of any client. A real professional can not only flawlessly perform the procedure, but also completely change the holistic image of the client. And for this, without knowledge of the laws of facial morphology - nowhere!
The presented article is an exclusive translation of the material published on the website of the international journal for micropigmentation specialists PMU International. Magazine of Permanent Makeup. Original article - link
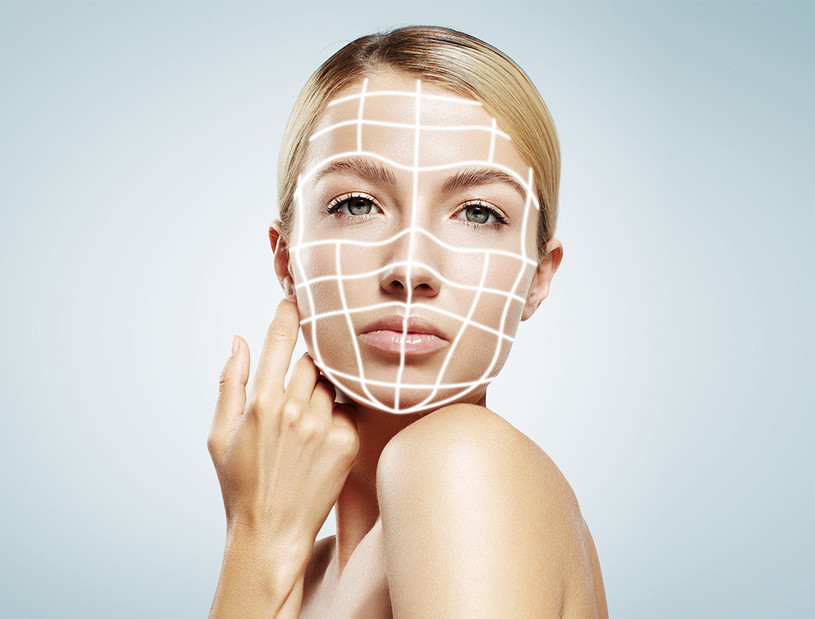
It is well known that a perfectly symmetrical face does not exist. However, for specialists in certain fields, such as facial plastic surgery or micropigmentation, it is vital to create a model of a "normal" face as a template for their work. Such a face will be well balanced and as symmetrical as possible. This symmetry is represented by a series of virtual reference lines. With the image of a “normal” face in mind, the practitioner will make wiser and more informed decisions, doing their job with a high degree of accuracy.
The human face is subject to constant changes that occur for many reasons. Among these causes are changes in growth, muscle tone, distribution of fat and hair, and the quality of elastic tissues. It is important for the permanent makeup master to keep these changes in mind in order to choose the most appropriate pigment application technique. Thus, patients who are older require a thinner rather than an intense and heavy distribution of pigment. It is also important to remember that due to changes in skin elasticity and muscle tone, their faces may differ significantly from the normal face discussed below.
The first step in any successful micropigmentation procedure is a proper assessment of the face. To be able to do this in the most accurate way, the permanent makeup artist must be familiar with the basic concept of facial morphology and make facial analysis a routine. In order to simplify the face assessment procedure, we are going to present you with the main guidelines.
Facial analysis
The analysis begins with reference to the midsagittal facial line (F1 ) dividing the facet into vertical halves. Technically, this line does not necessarily define the middle of the nose. Rather, it should be drawn from the top of the skull to the lower middle region of the chin. On an ideal face, the midsagittal facial line really coincides with the middle of the nose, dividing the face into two equal parts. However, in practice, the artist will notice that in most faces the nose is deviated to one side.
The second most important reference line is the mid horizontal iris line (F2), which is perpendicular to the midsagittal facial line (F2).
The midhorizontal iris line (F2) passes through at least one iris (in an ideal face it passes through both). The artist chooses the eye closest to the position that divides the face into equal parts - upper and lower.
The two main reference lines are the main ones, creating a canvas for further evaluation of the face. When carefully examining facial morphology, the artist should also use the subordinate reference lines described below. In a broad sense, they are divided into three main groups: vertical parallels, horizontal parallels and oblique lines.
Vertical parallels
N1 is a vertical line parallel to F1, it is drawn through the lateral side of the nostrils and passes further through the lateral part of the lacrimal canal. This defines the first part of the brow line.
H1 is a vertical line parallel to F1 and N1, it runs downward through the outer edge of the iris and should ideally correspond to the angle of the lip.
L3 is a vertical parallel line that runs from the top of Cupid's arch on each side, and runs perfectly. The nostrils should be divided into equal halves.
Horizontal parallels
L1 - a horizontal line parallel to the line F2, drawn on the lower border of the lower lip. Ideally, the area of the face between the bottom of the chin and the tip of the nose should be divided into two equal parts.
L2 is a parallel line drawn, therefore, on the upper border of the upper lip.
B1 - a parallel line that should connect the nose of the eyebrow with the temporal part.
B2 - a parallel line that defines the upper border of the eyebrows.
oblique lines
N2 - an inclined line running from the side of the nostrils and passing through the lateral corner of the eye, on an ideal face should define the most temporal part of the eyebrow (eyebrow tail). If elongated low, this line should fall into the center point of Cupid's bow.
H2 - an inclined line drawn from the side of the nostrils on the outer border of the pupil, going up, should reach the top of the eyebrow.
Read also
- Permanent lip makeup: TOP 5 customer requests
- Skin properties and color types, or why color is so important in a permanent
- "Pitfalls" of PM and how to avoid them for a novice master
- Arrow in permanent makeup: an unfading classic
- The cost of the service, or How to determine the price of permanent makeup
- Oily skin and permanent makeup: acceptable techniques
- Permanent make-up of arrows: an individual approach
- Permanent Makeup Removal: When is a laser preferred?
- Shot
- Permanent makeup