PM in pencil technique: soft arrow
Step by step master class

Sometimes spending time on makeup in the morning is an unaffordable luxury, especially when it comes to the arrows on the eyelids. We suggest considering the PM technique, which will create the effect as if the eyes were lined with a pencil
Irina Tkachuk , PM master, head and teacher of TiLab permanent make-up studio, participant of PM conferences, author of her own brow mixes MIXIT
Now, most women are immersed in business so much that spending time on makeup in the morning is an unaffordable luxury, especially when it comes to arrows on the eyelids. We suggest considering the PM technique, which will create the effect as if the eyes were lined with a pencil
Choosing the right eyelid makeup is a very important task for every woman. Permanent make-up of the eyelids is an ideal procedure for those clients who draw the same arrow every day and want to save precious time in the morning. PM eyelids will help to visually remove the effect of an overhanging eyelid, correct the shape of the eyes, and make the look more expressive. Be sure to coordinate with the client the length, thickness and shade of the future arrow. The variety of applied techniques provides an individual approach to each client.
In this master class, I will tell you a little about the little secrets, using which you can get the perfect arrow in the pencil technique. This technique suggests her more airy upper edge. Due to the loose line, the arrow will look softer.
Photo 1–3 . Eyelid before sketching.
Photo 4–5 . Drawn a sketch. For this, I use a regular gel pen. In order for us not to lose the lines when applying anesthesia, we circle the arrow with a marker.
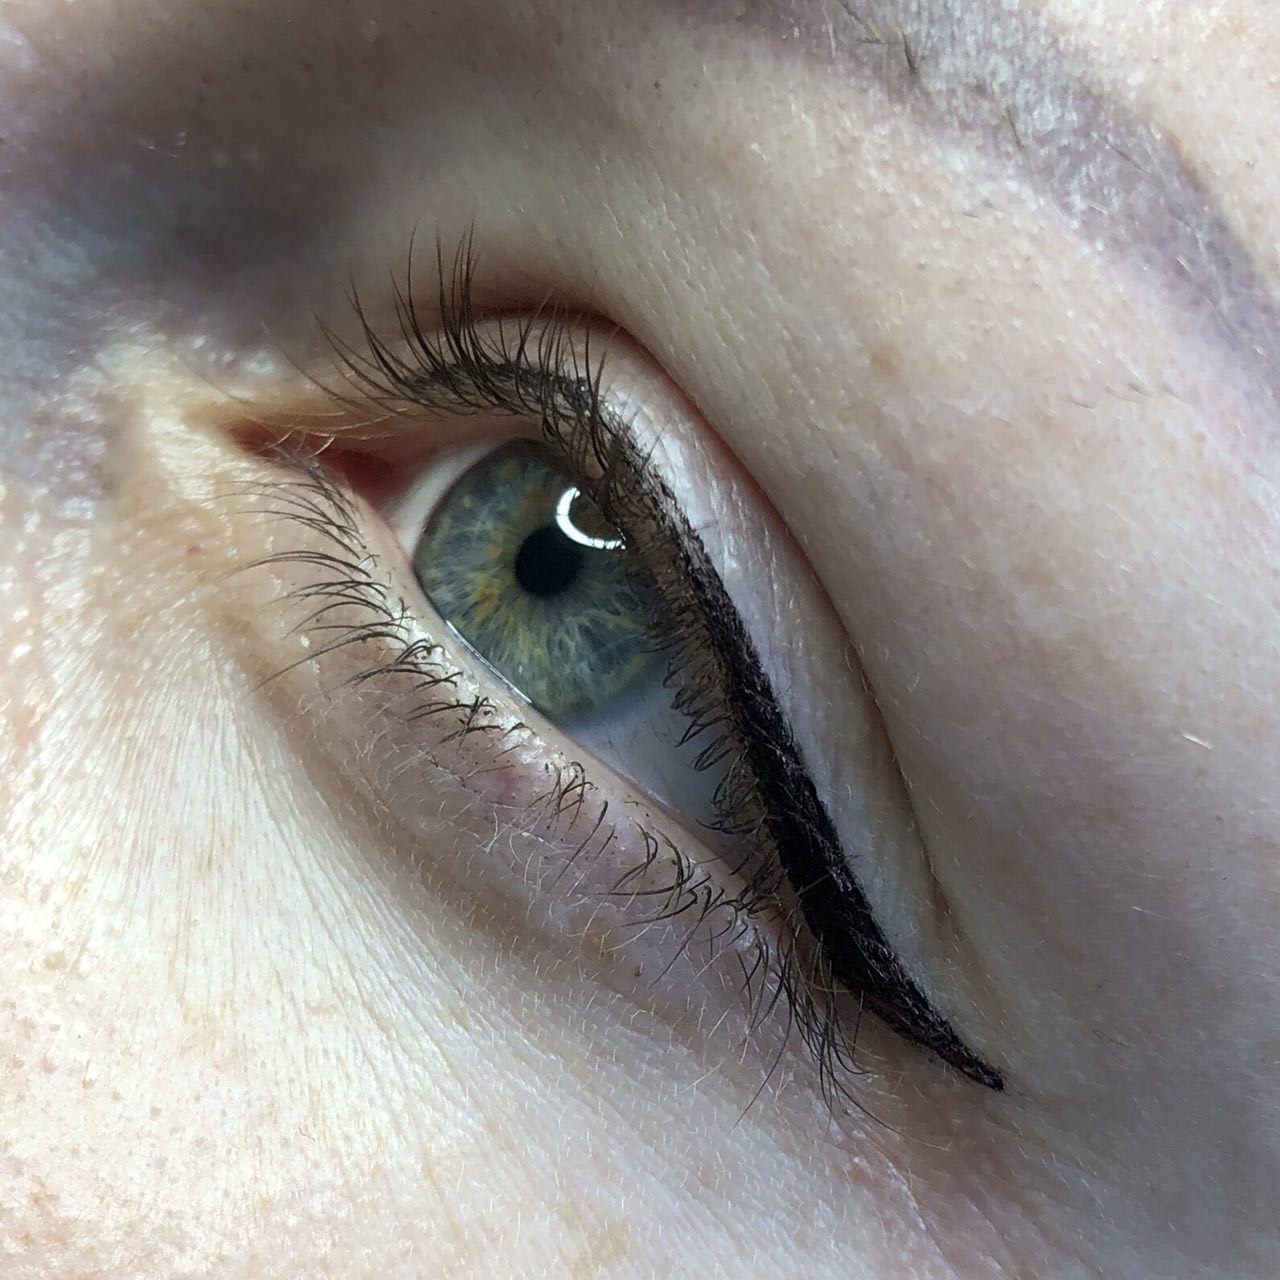

Photo 6-8 . We apply anesthesia. To do this, it is very convenient to use a syringe with a cut needle. Then you will definitely be able to get close to the inter-eyelash zone and work it out without getting into the eye and without overspending the cream.
We remove anesthesia with a cotton swab. Carefully, as if pushing the cream over the eyelashes, so that it does not get into the eyes. It can be seen that there was a trace of purple. Now we won't lose the sketch.
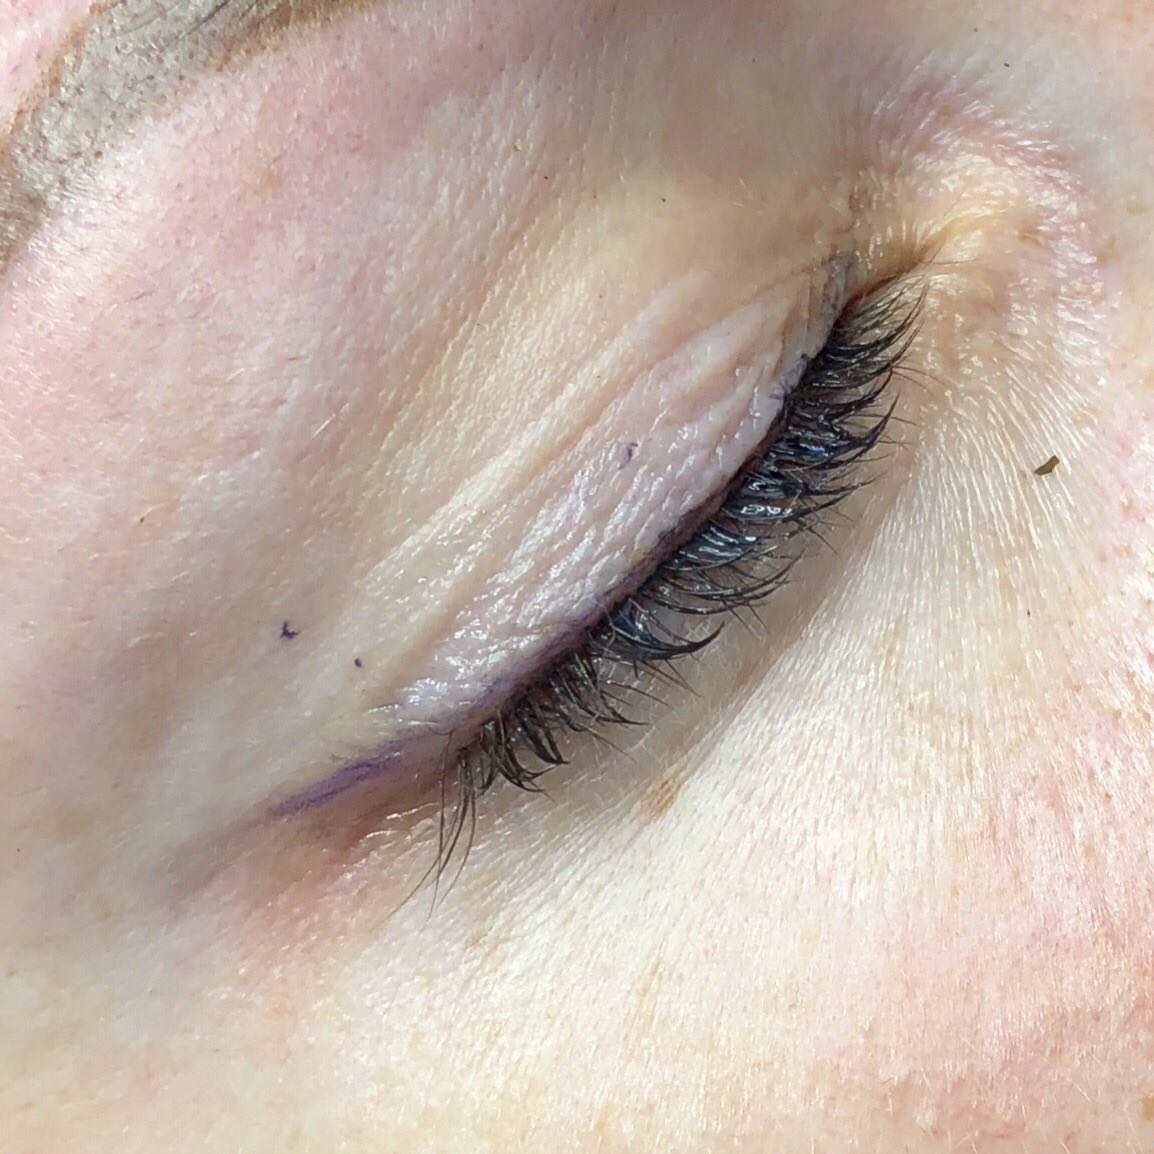
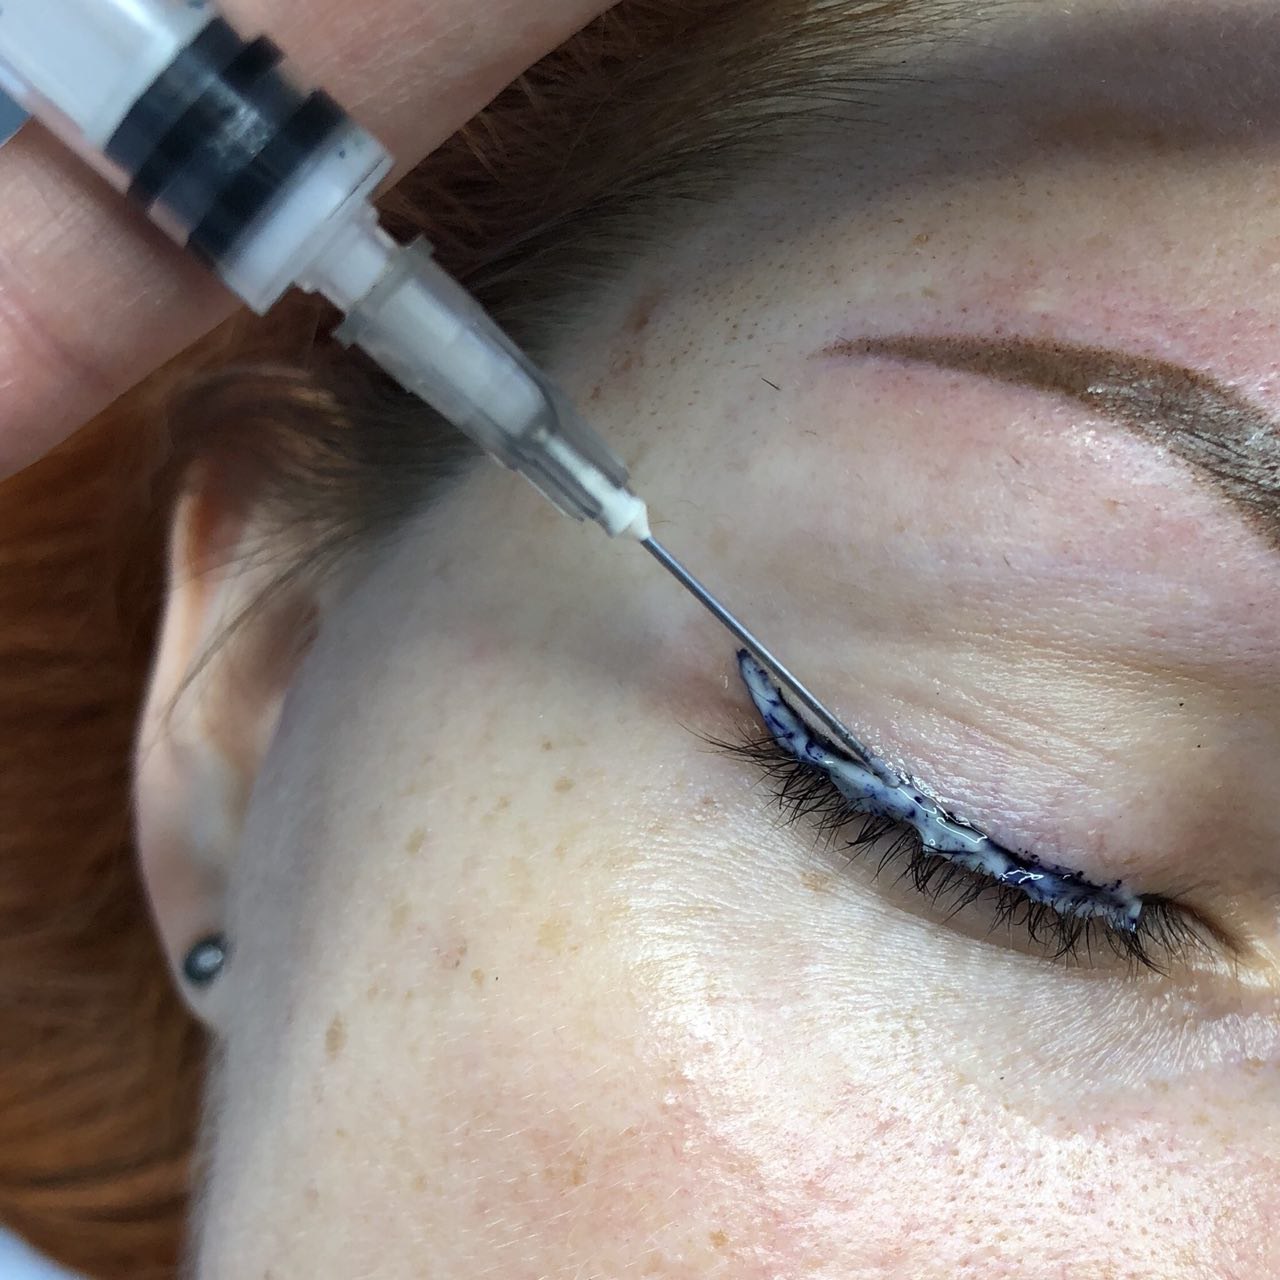
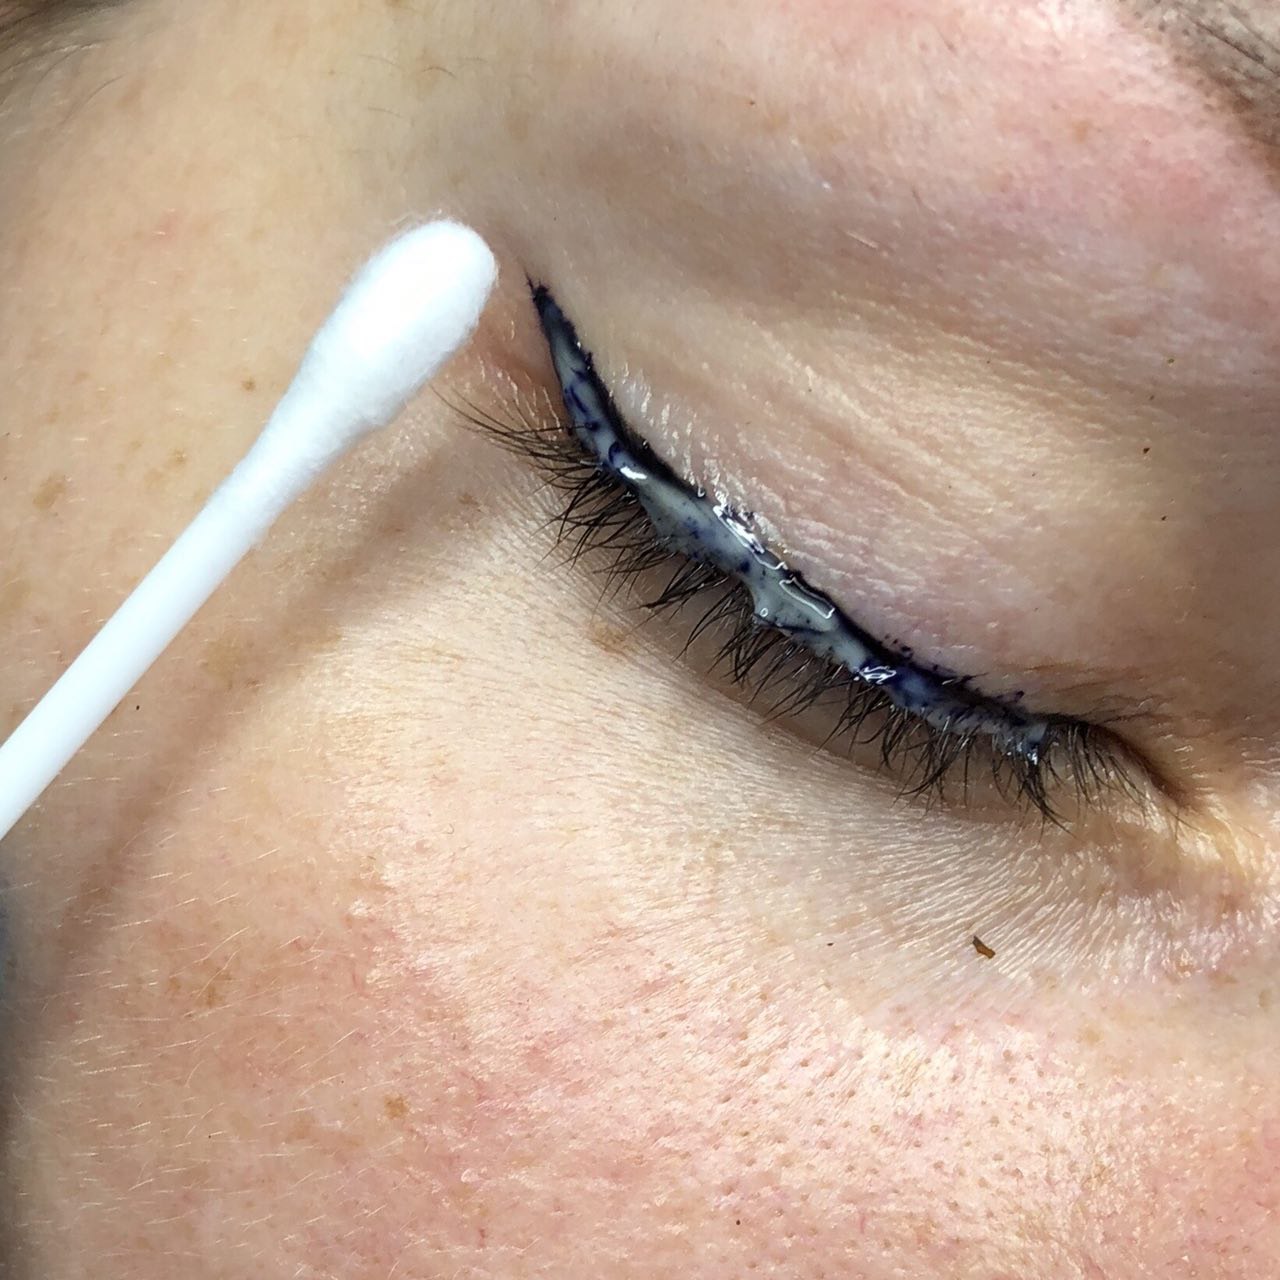
Photo 9-10 . Draw the bottom line. Slowly, moving towards ourselves, we try to work in one line. Be sure to stretch the line to the edge of the eyelashes. This is a very important point. Since, if you do not “attach” the line to the eye, the arrow will “fly”.

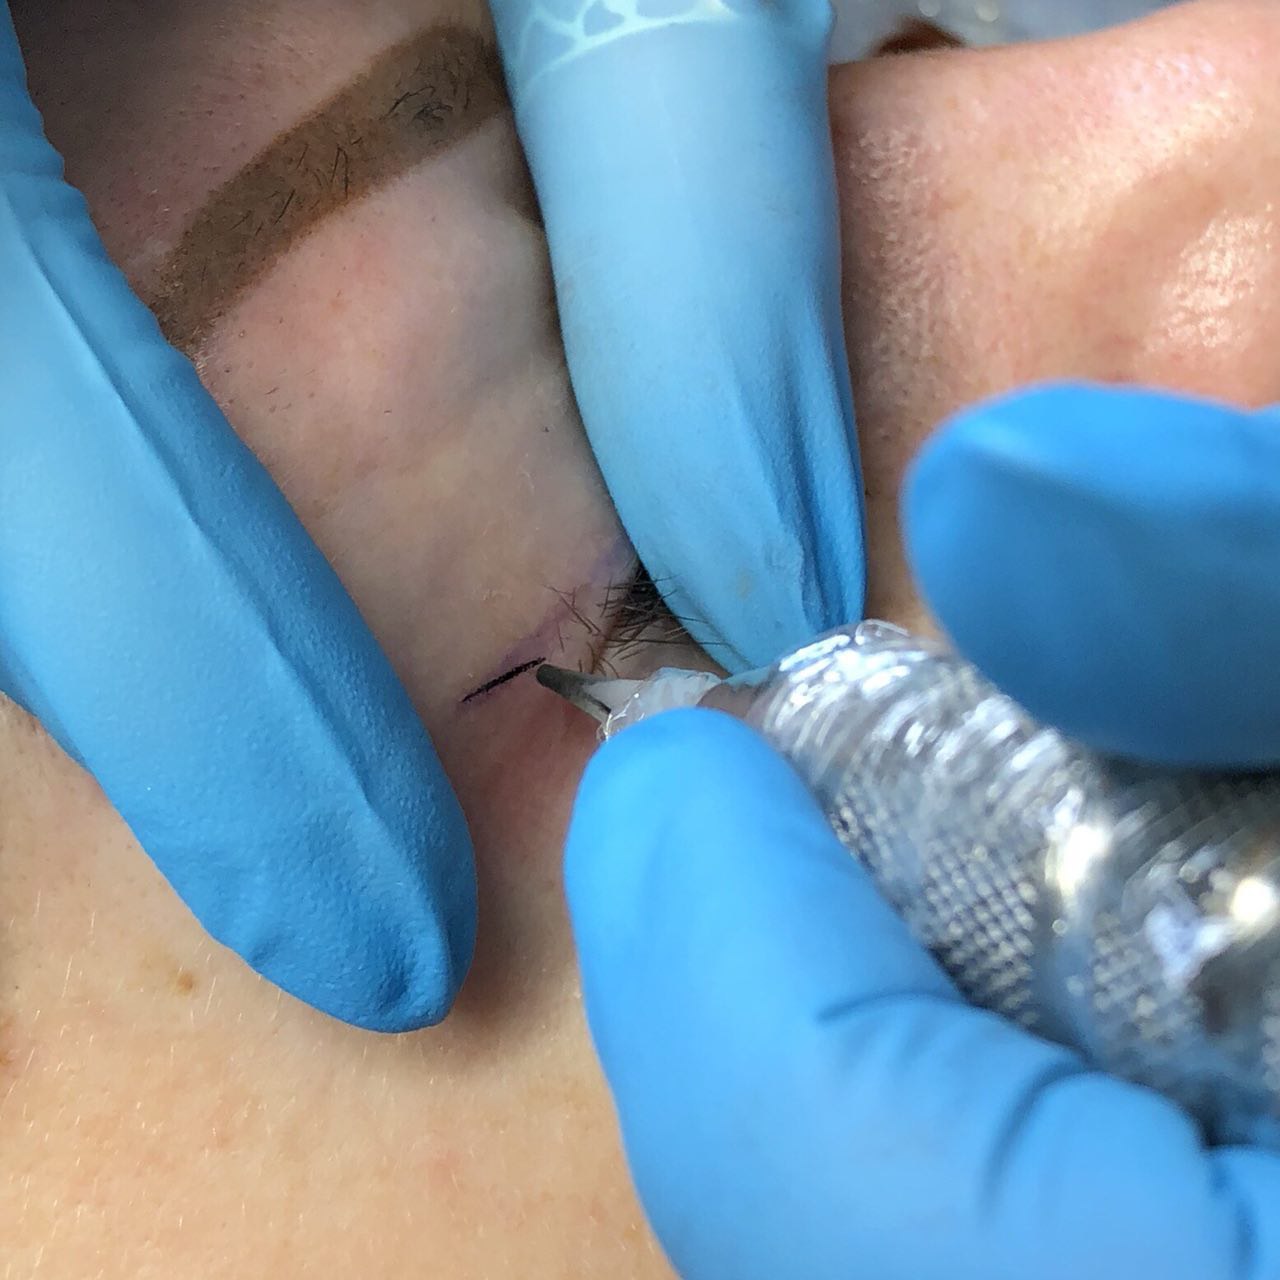
Photo 11-12 . We direct the upper line of the arrow. A very important point that you should pay attention to: we start the top line a little below the already drawn tail. Then the line will remain thin, the tail will go into the hair and will not float. Next, fix the entire sketch along the top line.
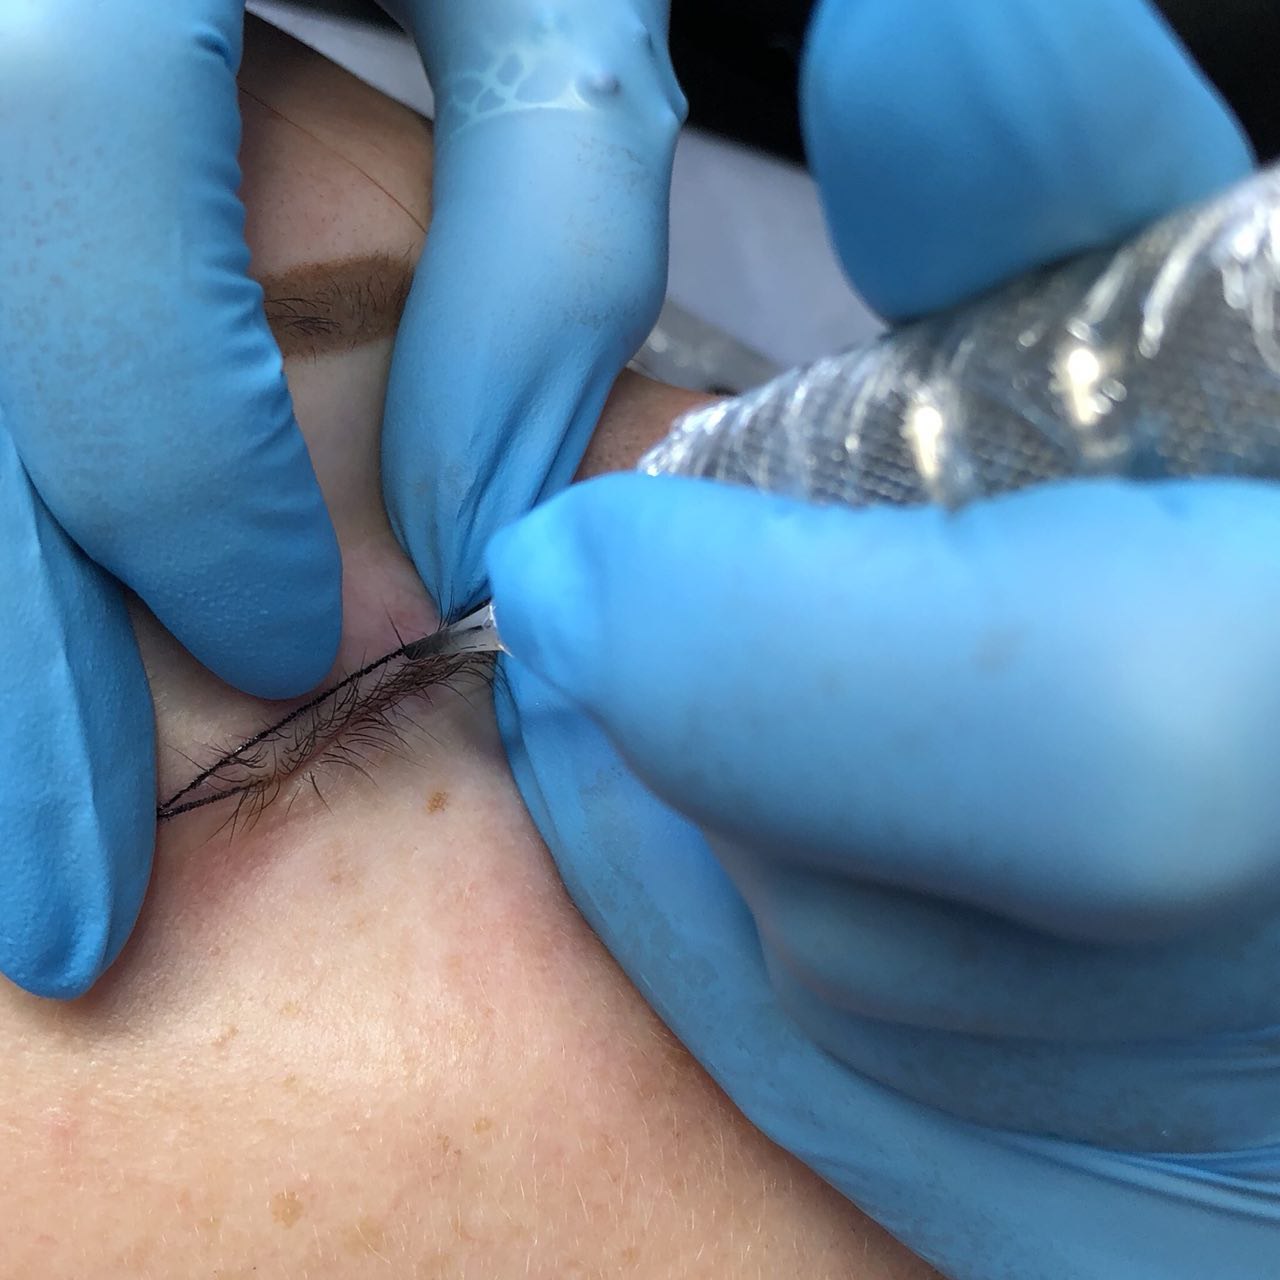
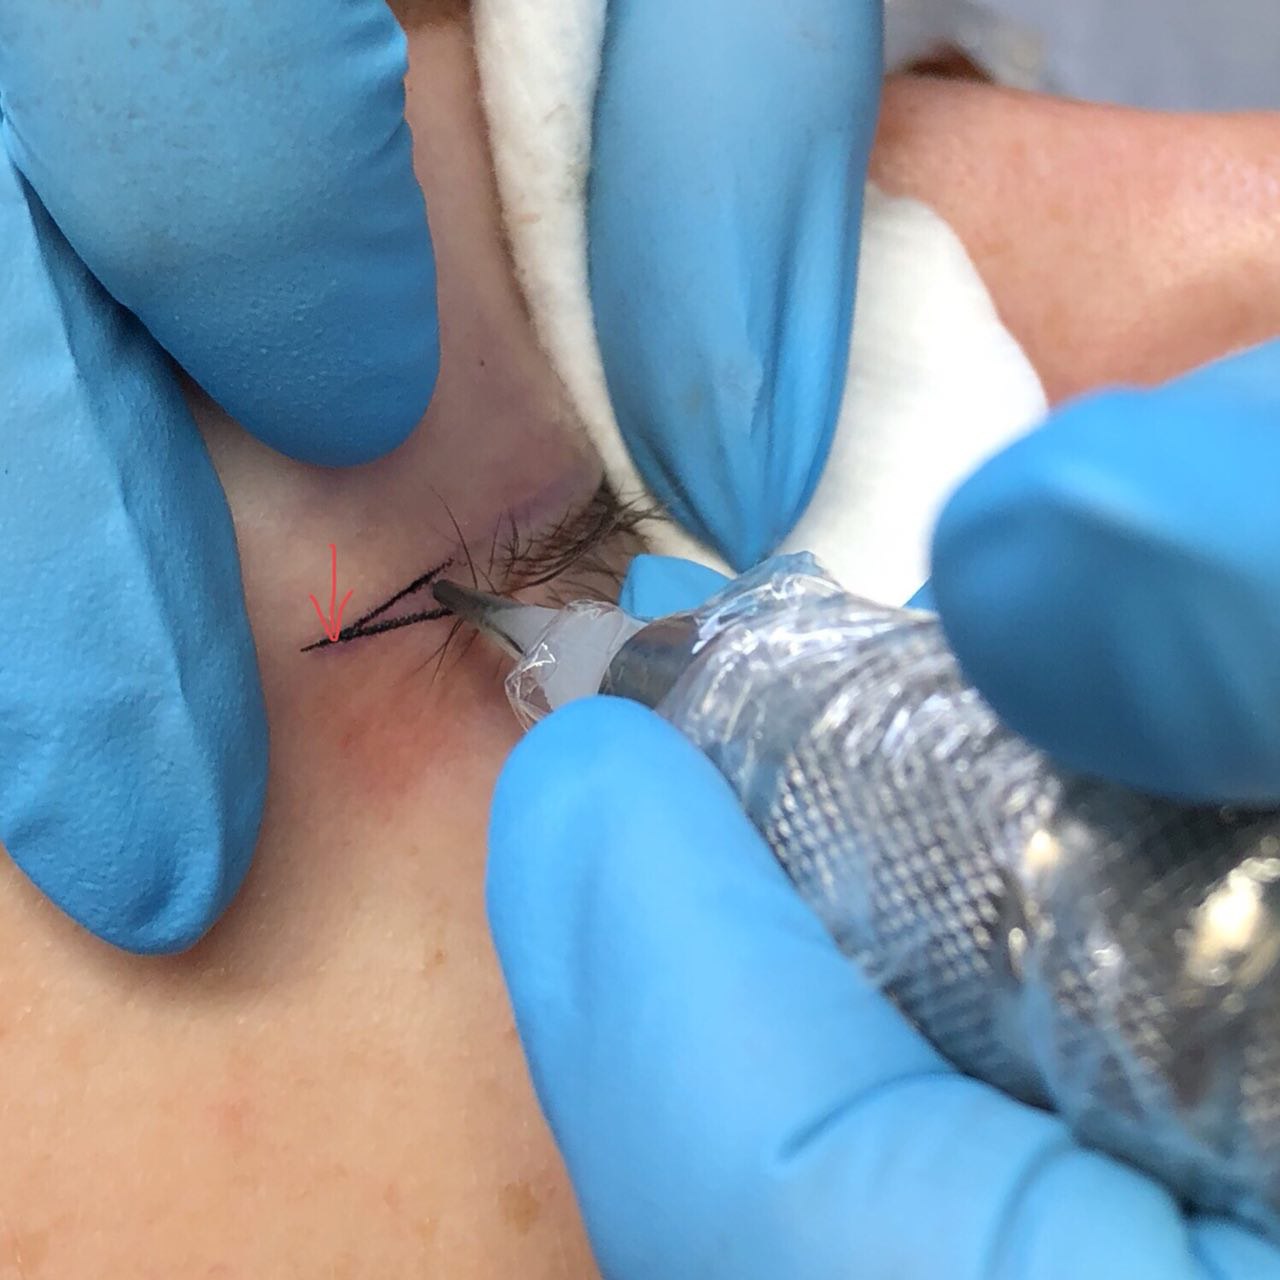
Photo 13 . Walking along the contour of the arrow, we clearly see the shape and thickness.
Remove the remaining paint with a cotton pad.
Photo 14-16 . We fill the interstitial space. It is important to do this slowly, with short strokes, since the skin in the inter-eyelash zone is denser than on the eyelid, and the device needs time to puncture and apply the pigment. If you move your hand too fast, the needle will not have time to make a puncture! Accordingly, there is an injury - there is no pigment. As a result, during healing, the interciliary space will remain unfilled.
When filling in the inner corner area, I advise you not to make a clear contour line. Shading will look much more beautiful and gentler. Then there will be a darkening effect in the area of \u200b\u200bthe eyelashes, but without a clear line, accordingly, there will be no heaviness of the look.
We fill the inter-eyelash zone and rise a little above the eyelashes - to the outer corner of the eye.
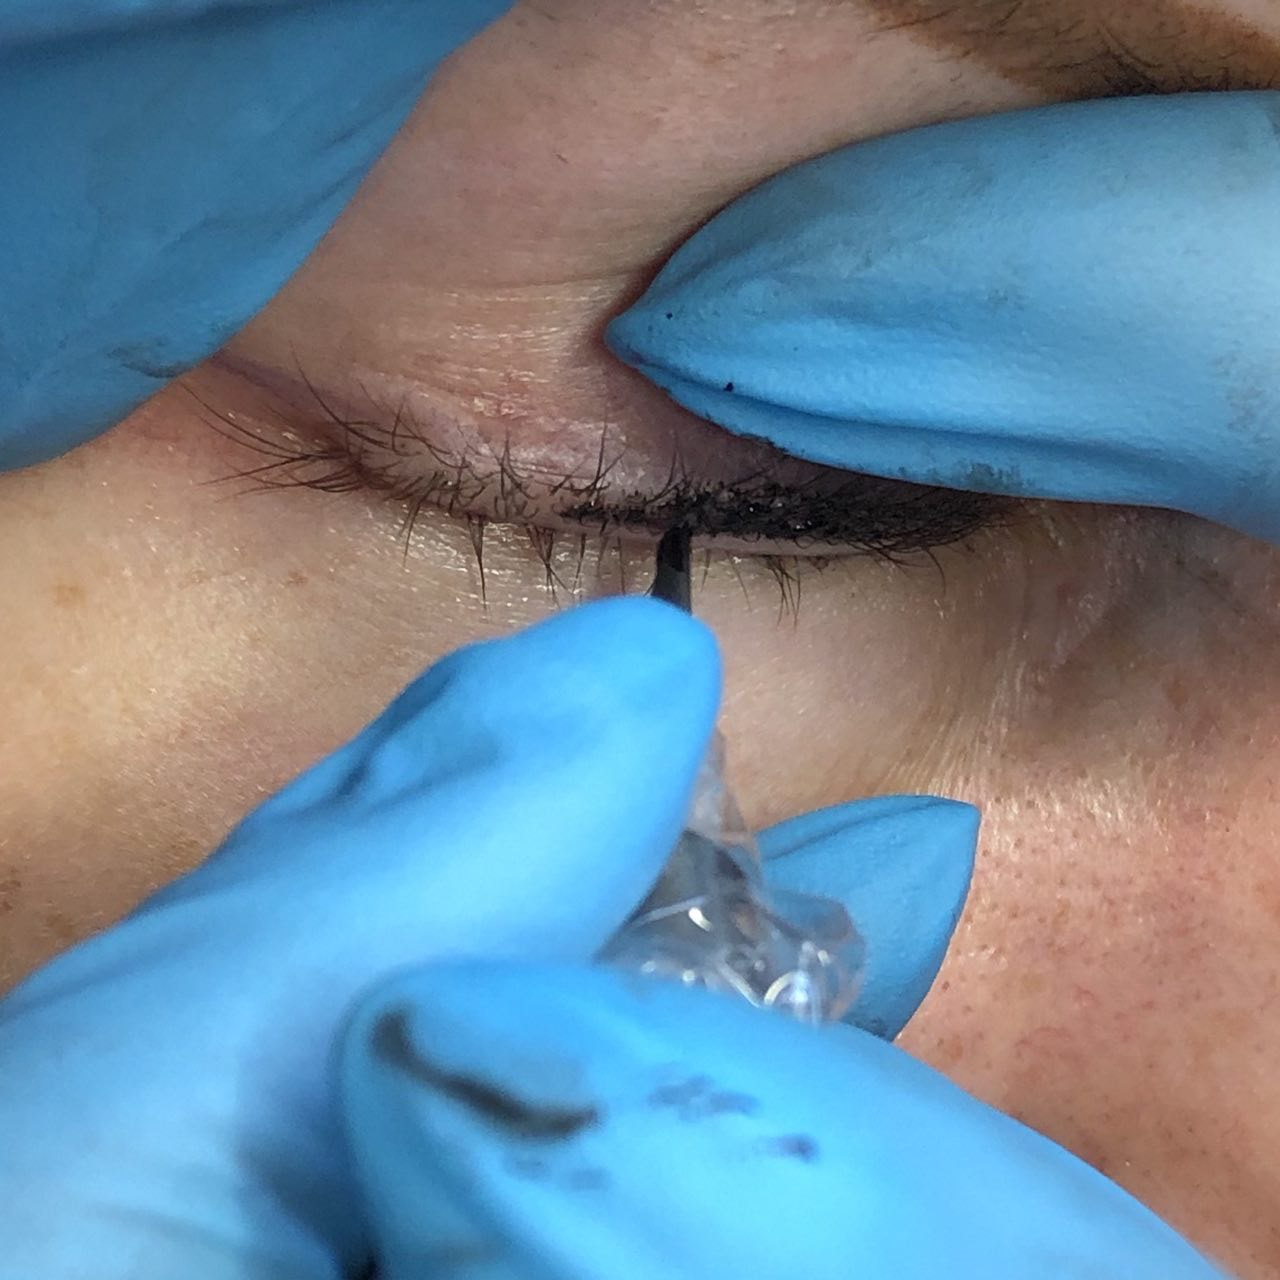
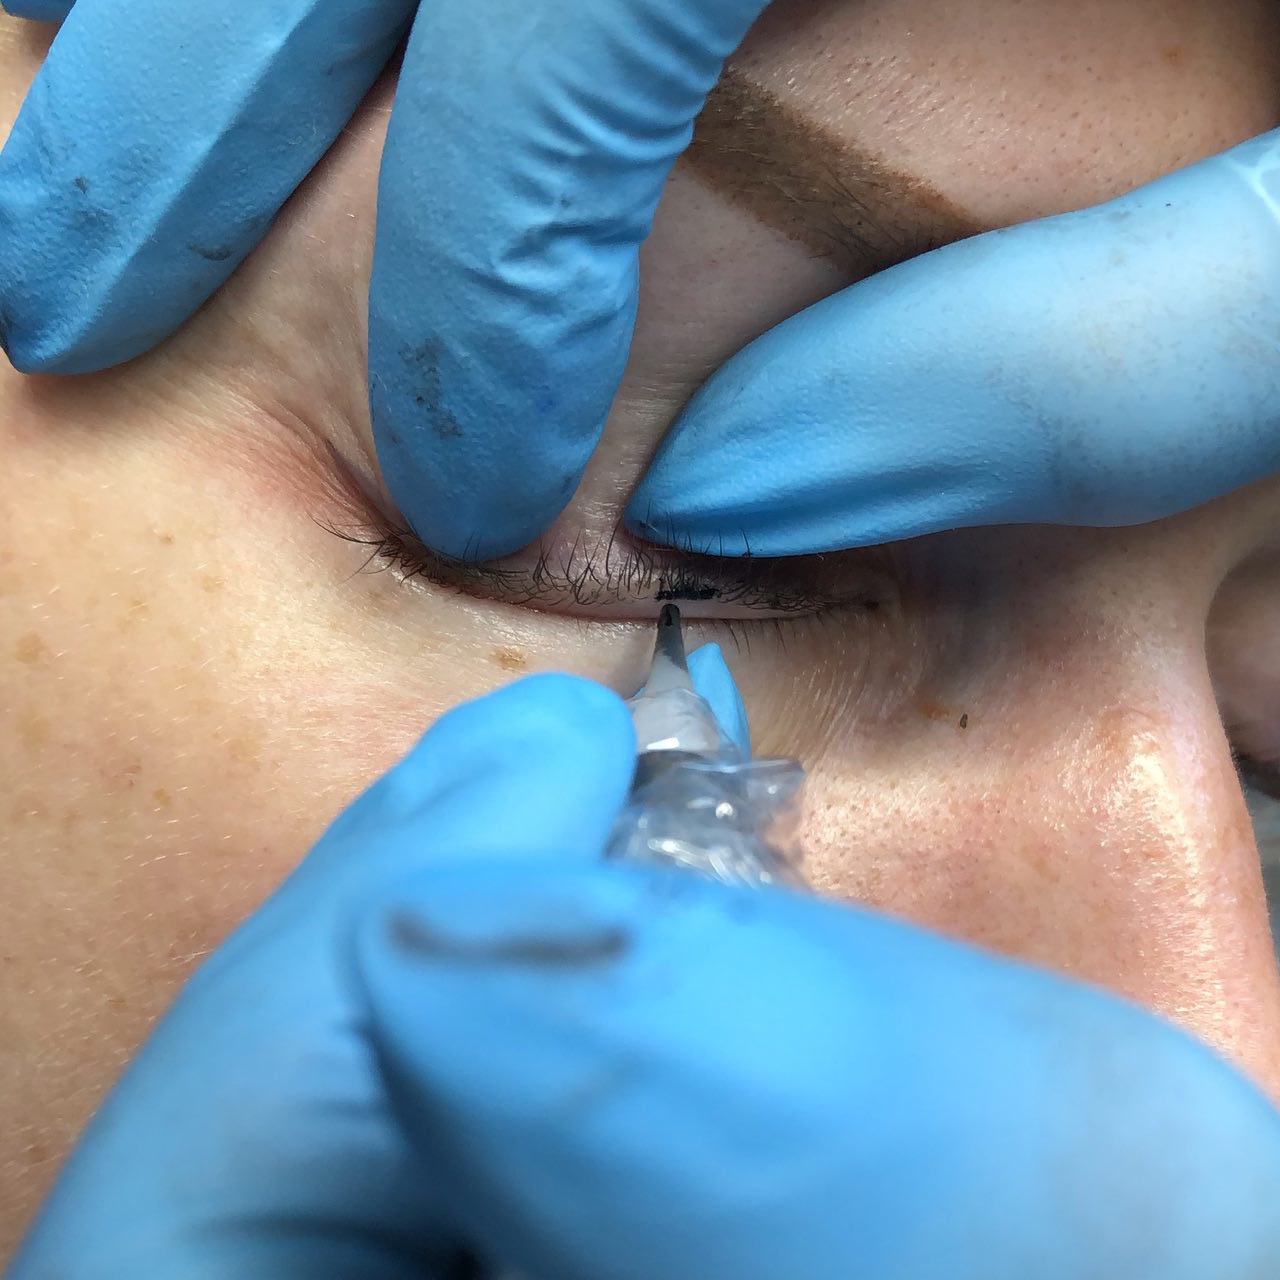
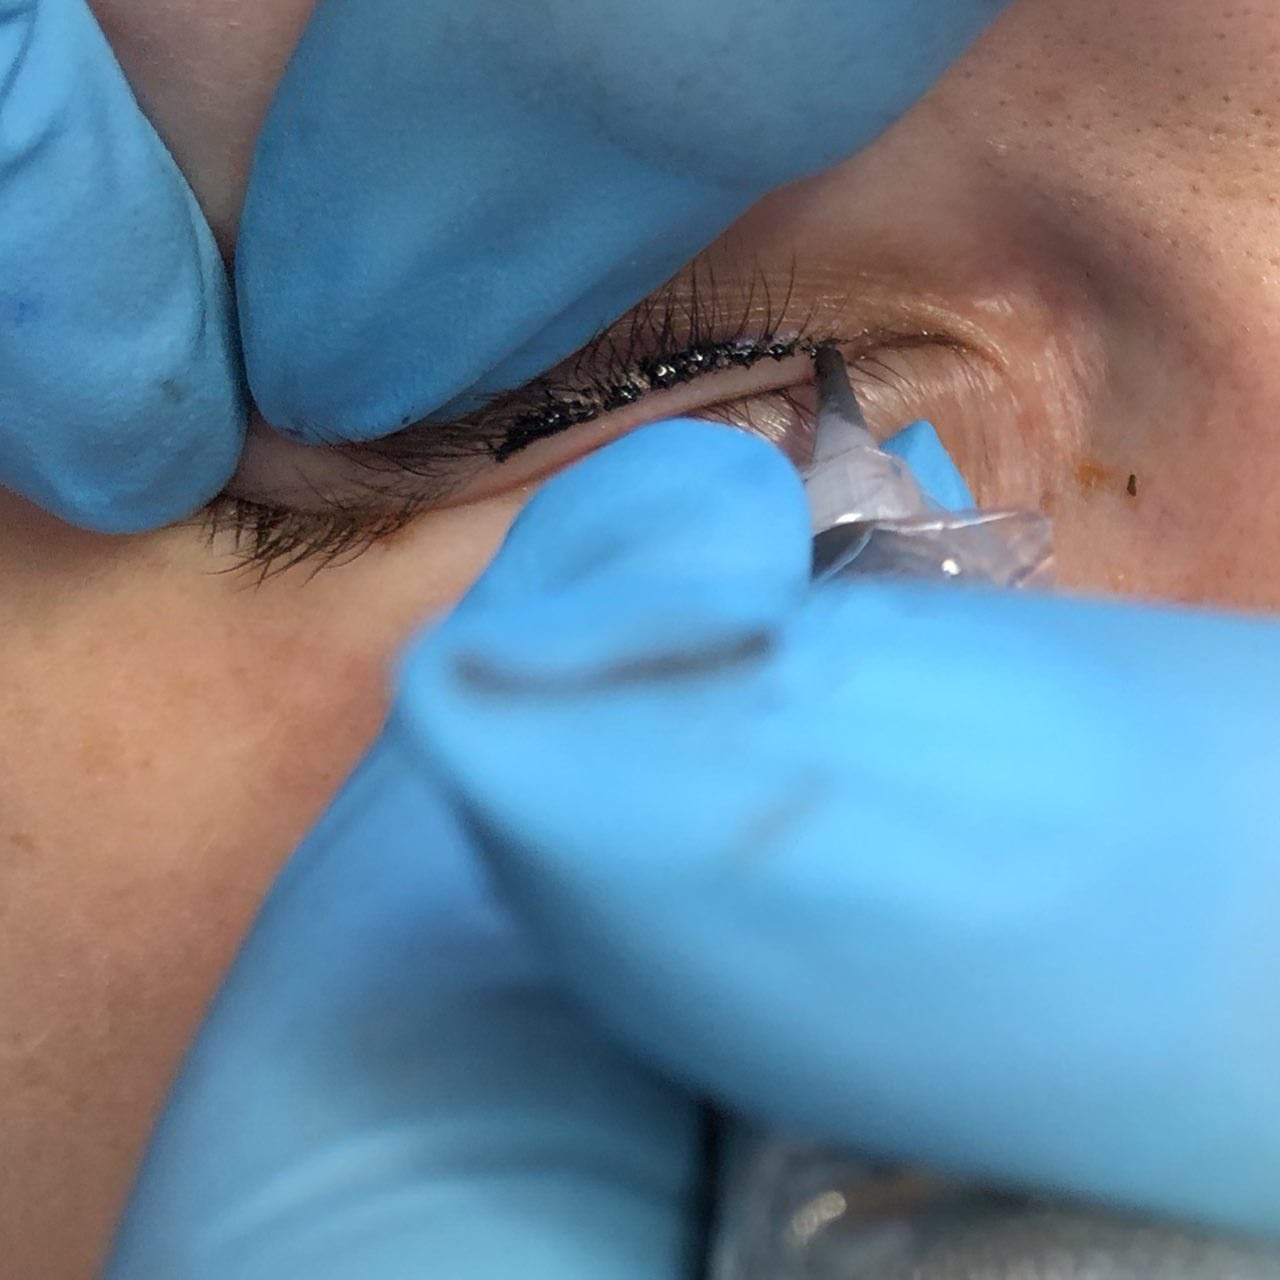
Photo 17-19 . We fill the arrow throughout the thickness. Movement - on yourself, with short strokes, as if spraying color.
Photo 20 . We repeat the same passage a second time. In the photo - two passes of spraying color. When working in this technique, it is very important not to apply a clear outline along the top line. We pass along the contour (linearly) once when fixing the sketch, we shade all other passes, like with a pencil on paper.
We make the third, final pass. Fill with color and create velvety. There is some swelling immediately after the procedure. It can last a couple of hours, or maybe even a day. It all depends on the individual characteristics of the client's body.
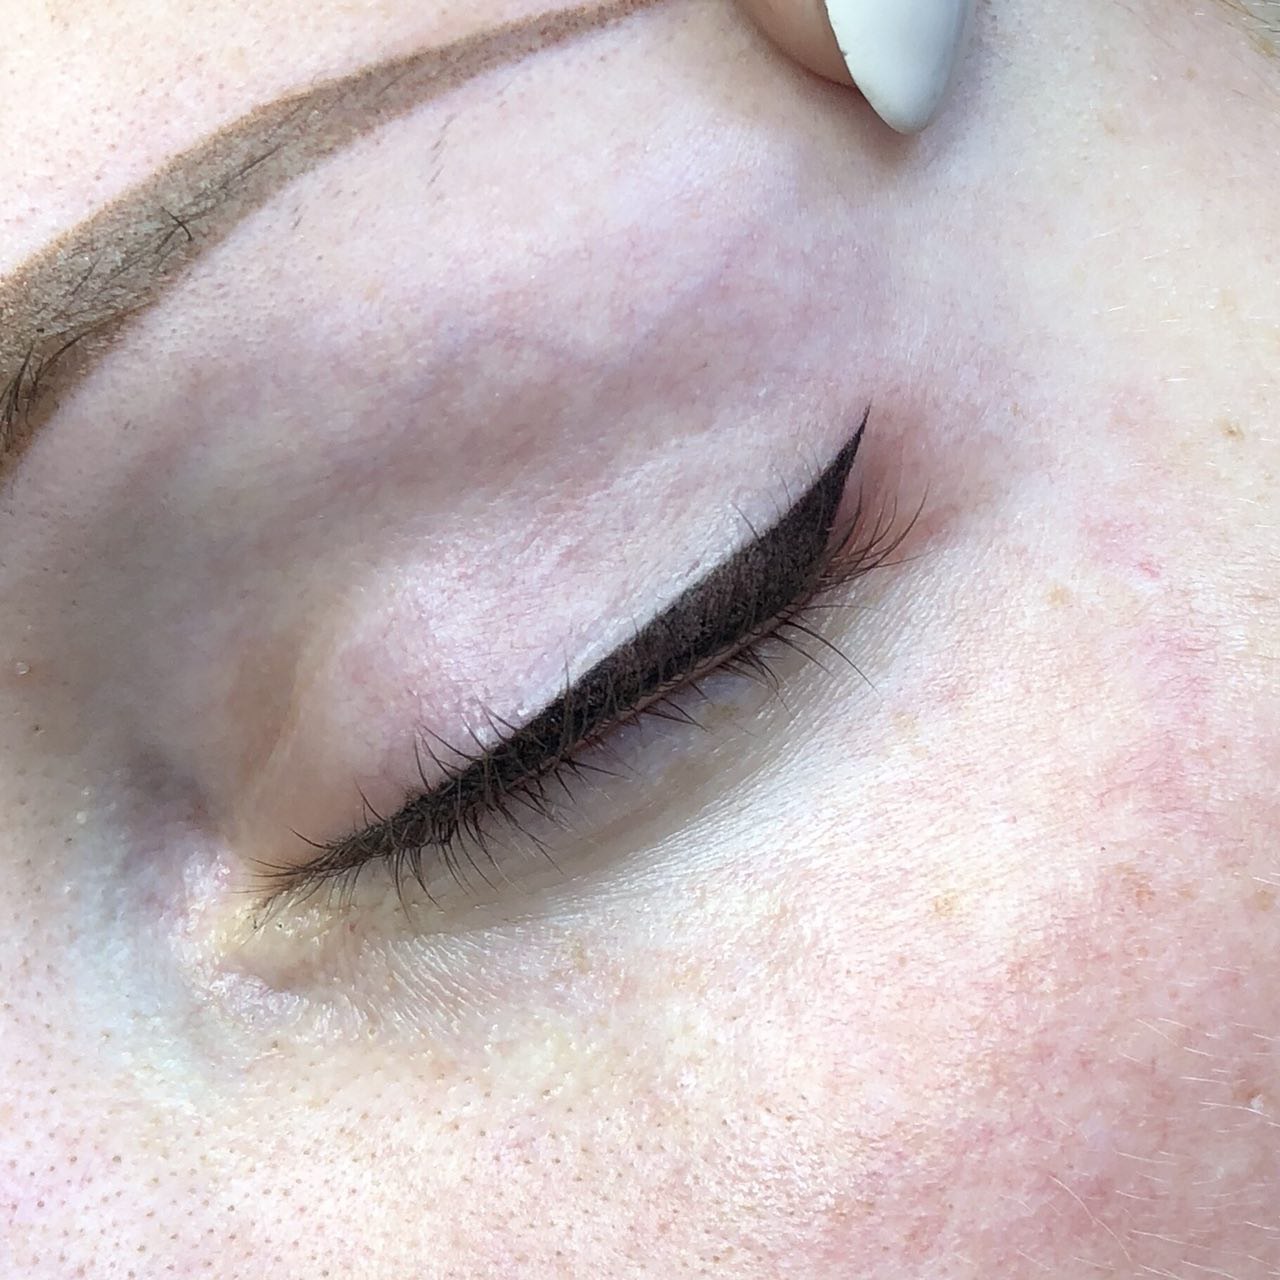
Photo 21-23 . The end result is as natural and natural as possible. The filling of the inter-eyelash zone created the effect of thick eyelashes, and the arrow gave softness to the look.

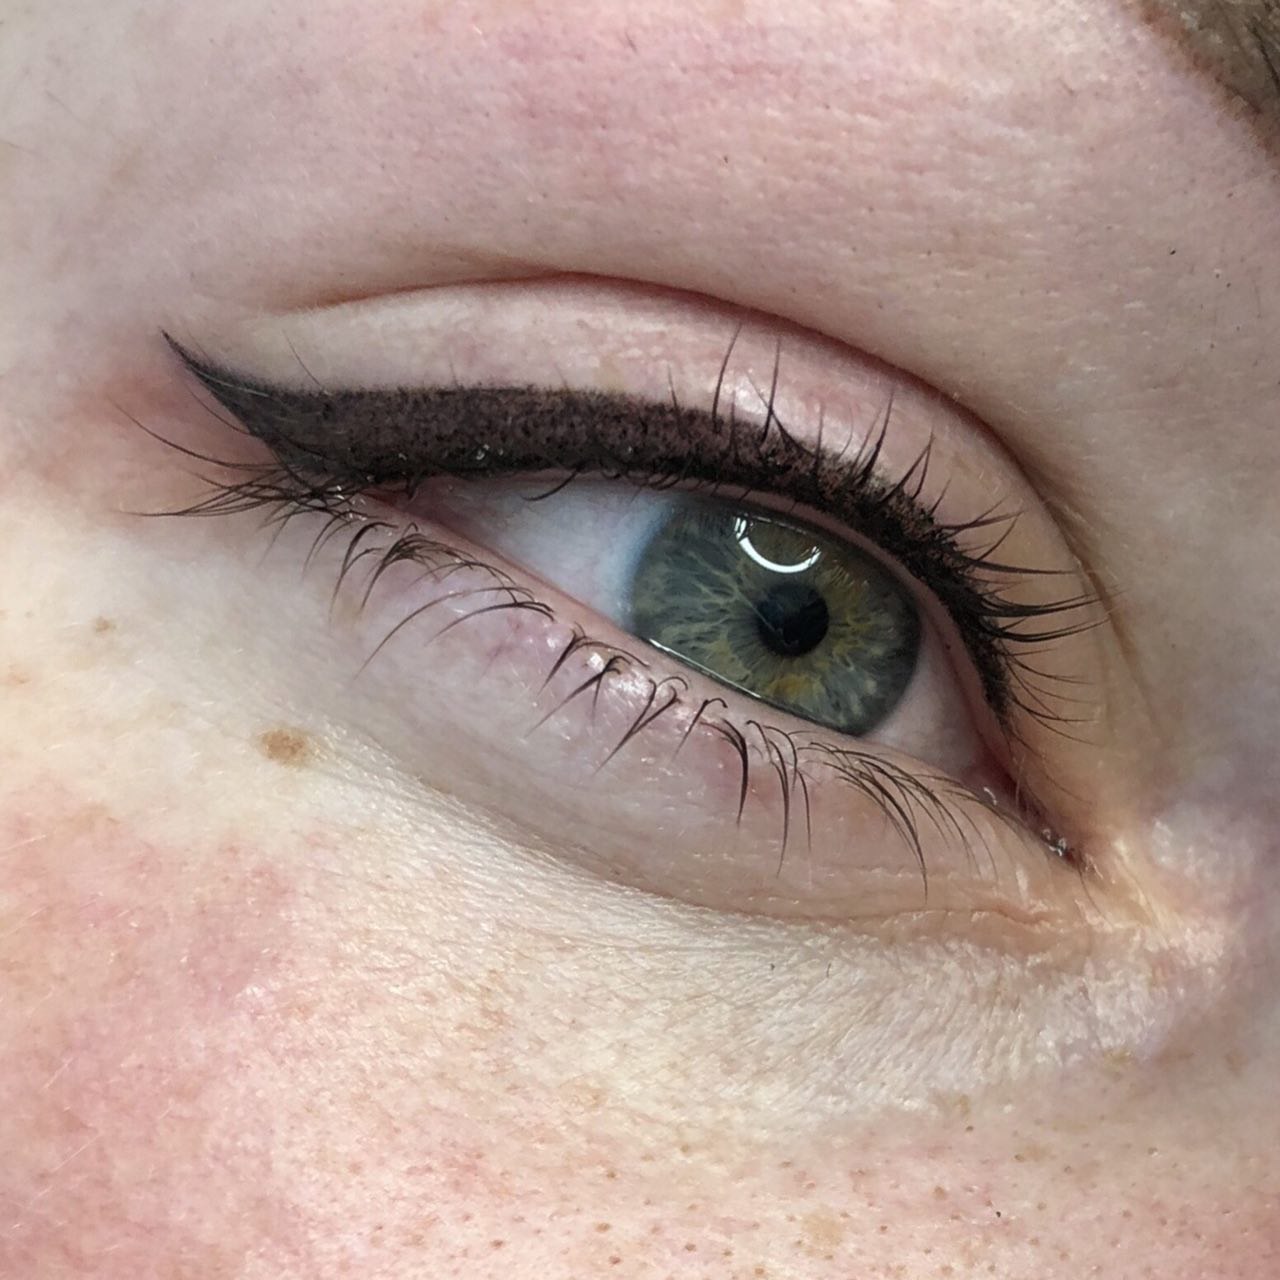
Even fans of a natural look will agree that it is quite difficult to draw thin symmetrical arrows. The PM eyelid will create a permanent contour, thereby giving your eyes the opportunity to rest from the daily use of decorative cosmetics.
The material was first published in Permanent No. 3(11)/2018
Read also
- Permanent lip makeup: TOP 5 customer requests
- Skin properties and color types, or why color is so important in a permanent
- Arrow in permanent makeup: an unfading classic
- The cost of the service, or How to determine the price of permanent makeup
- Permanent make-up of arrows: an individual approach
- Complex permanent make-up: master's difficulties and client's fears
- Tattoo eyelids "perfectly": there are no standards in the procedure!
- Art permanent makeup
- Classic arrow
- Permanent makeup