Lip kiss tattoo technique: the effect of kissed lips
Procedure steps

Clear, graphic lines in PM are a thing of the past, and at the peak of popularity - naturalness. With regard to lip tattooing, this manifests itself in the absence of a pronounced contour and the creation of the effect of kissed lips.
Alla Gurbova, permanent makeup master, trainer and head of the permanent makeup school in Cyprus (Limassol), makeup artist, bronze medalist of the International Permanent Makeup Championship (Italy, 2018)
Increasingly, girls began to ask to give their lips juiciness and brightness, as if after a kiss. The effect of kissed lips is one of the most relevant and romantic beauty trends of this season. And, of course, drawing inspiration from the work of makeup artists, I want to apply these trends in permanent makeup. The lip kiss technique allows you to achieve this effect by moving from a lighter color near the contour to a more saturated (berry color) closer to the center of the lips. The result is not striking, leaving a soft accent on the lips. It's like a 3D technique, but in reverse. In order not to visually reduce the lips, but to emphasize their beauty, creating the effect of a kiss, certain conditions must be observed:
- do not use this technique on too narrow lips and with pronounced asymmetry;
- choose pigments that are not too bright;
- use layered shading.
The work is done with textured needles 1 R (AB) 0.3. Units make it possible to perform jewelry work and paint over the surface in the most detail. Their texture allows you to save the maximum amount of injected pigment after healing. The speed of the machine is high, and, accordingly, the speed of the movement of the hand, too, for fine spraying of the pigment. The tilt angle is always 90 degrees. I use iColor pigments.
Procedure steps
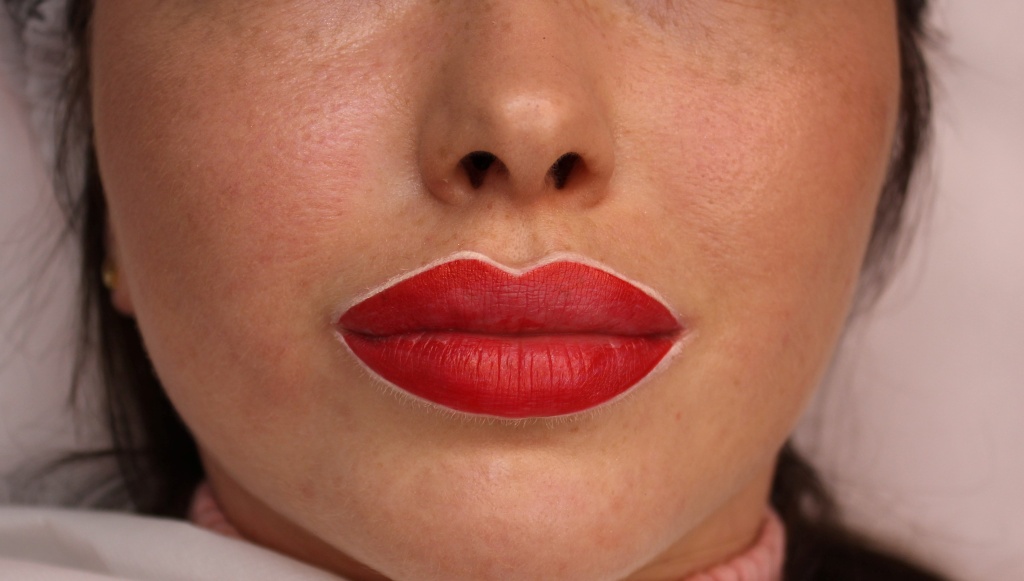
1. Sketch. Despite the fact that there is no clearly defined contour and the procedure is performed within the limits of the client's own lips, a sketch is necessary, since under the influence of anesthesia, too pale lips can become almost invisible and the likelihood of error and overflow increases. You can also correct slight asymmetries and imperfections.
To draw a sketch, I use Magic liner by Svyatoslav Otchenash. To fix the sketch - ivory gel eyeliner from Make up Atelier, it is not washed off and remains for a long time during work (photo 1).
2. Anesthesia. I use "Mesonamb" under the film for 15-20 minutes.
3. Contour. This stage of the procedure is performed with short reciprocating movements, as quickly as possible, without stretching the skin, in nude color, in order to outline the boundaries of the work for the master, but not to get a clear outline.
4. First layer. The same light nude color as the contour is used to create a substrate for the subsequent layer-by-layer application of other colors. Allows you to even out the color of the lips, makes it possible to apply the next main color loosely and create a glow effect. The lips are visually divided into segments, and until one segment is completely painted over, we do not move on to another (Fig. 2).
During operation, the skin must be stretched. The final result of this stage is that the lips are completely painted over with nude color (Fig. 3, photo 3).
Secondary anesthesia is applied if necessary. If possible, it is better to avoid a large amount of secondary anesthetic, as the skin becomes rough because of it, the introduction of the pigment is complicated. Also, the surface of the lips becomes very white, it becomes more difficult to assess the uniformity of the application of the pigment. If you still need to use an anesthetic, then you can apply petroleum jelly to the film and cover the surface with it, the petroleum jelly will not allow the skin to become very rough.
5. Second layer. For the second layer, we use a more saturated pink color, which is applied loosely, with a light spray - so that the lips become juicier, but the previous color shines through this layer.
6. The last layer. The brightest, berry color is applied in the center, in a semicircle, not reaching the lip contour (Fig. 4).
Application is carried out in two stages:
- first, long “rays” are applied from the center of the lip, they are shown by arrows in Fig. 5;
- then we move on to shorter “rays” - this is how a color transition is created (Fig. 6).
Hand movements are fast, the needle goes from the center right through the skin in order not to create clear boundaries. At this stage, it is very important not to oversaturate the center with color, but to create a color transition effect. If you are not sure, it is better to wait for healing and, if necessary, add brightness to the corrections.
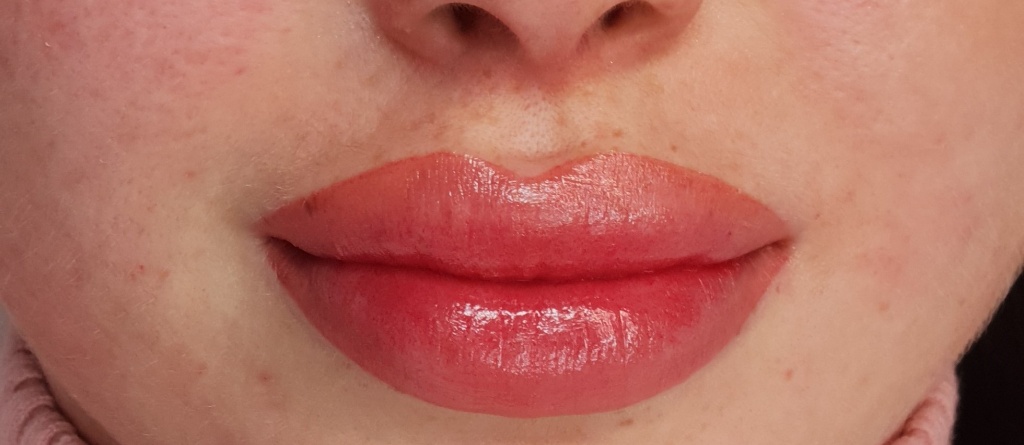
After healing, the owner of “kissed lips” gets a fresh, natural look, as if she had just made up with a slightly pink balm (photo 4).
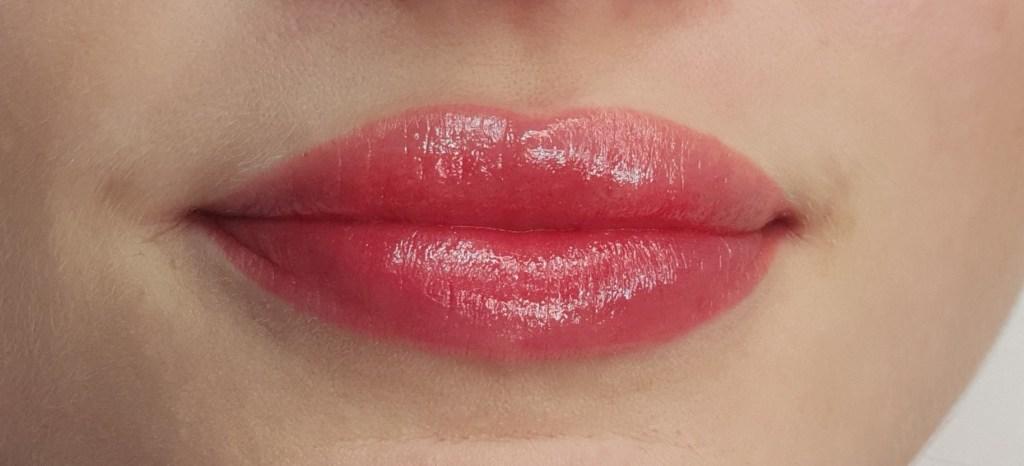
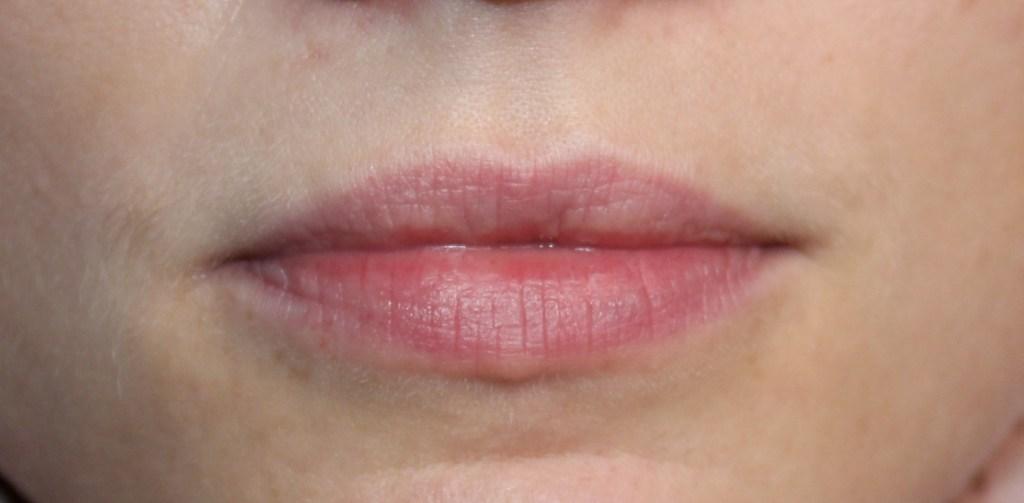
Client 1. Before/after photo
At the request of the client, you can make a more contrasting transition and a brighter middle, but on condition that your shape is almost perfect and your lips are plump. To do this, the first two layers fit more tightly. So that the lips do not lose their shape, in comparison with the center, the middle in this case is made even brighter red and also more dense. But the transition between colors should still be easy and smooth. In the above photos - a variant of this technique in more saturated colors (photo 5-8).


The duration of wearing such a permanent lip makeup is one and a half, maximum two years. With superficial work, the color should leave almost without a trace, after a while the client will be able to try something new, because there is no limit to perfection and imagination.
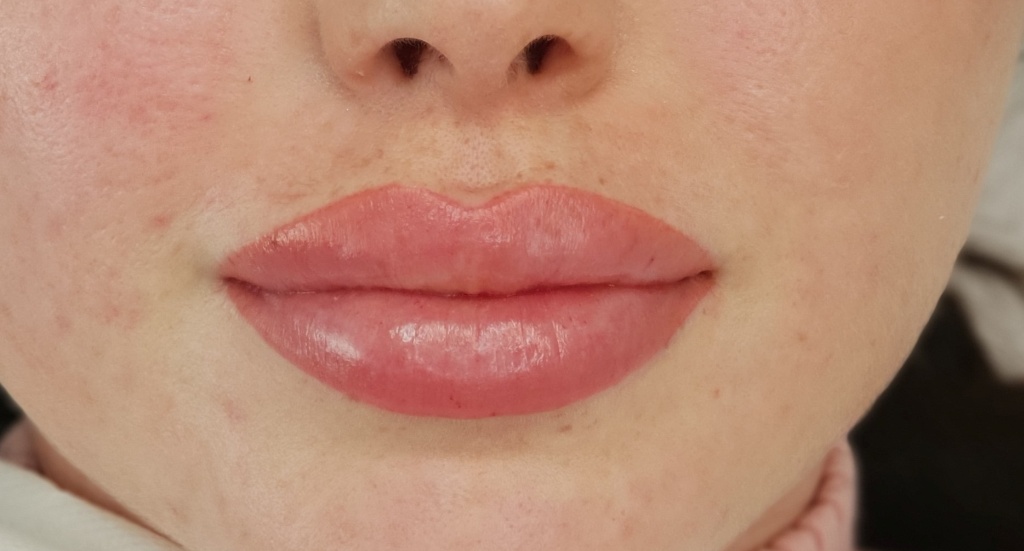
Client 2. Before/After photo

The material was first published in Permanent No. 1(13)/2019