"Colored mother-of-pearl": creative multi-color shading of the century
Author's technique

If your client wants something special, offer her eyelid makeup using this technique. Just seriously practice first, as this technique requires both skill, experience, and jewelry precision in application.
Elena Nikora, international micropigmentation specialist, head of the international educational system for micropigmentation at Amiea (Berlin, Germany), permanent speaker and expert at international congresses on PM and aesthetic medicine in Russia, Europe, USA, UAE, Asia and Latin America, current member of the international panel of judges of permanent make-up competitions in Russia and abroad, multiple winner of permanent make-up championships, author of his own techniques in permanent make-up, author of articles in professional journals on permanent make-up and micropigmentation, member of the Society of Aesthetic Dermapigmentation Specialists, has ten years of experience in the field of micropigmentation (Berlin, Germany)
If your client wants something really special, offer her eyelids using this technique. Just seriously practice first, as this technique requires both skill, experience, and jewelry precision in application.
Not so long ago, permanent make-up of the eyelids was limited only to the inter-eyelash contour and the classic arrow. But the fashion in decorative make-up leaves its mark on the desires and preferences of our clients in a timely manner, and more and more often it is the clients who give us bold ideas in an effort to remain beautiful in any situation. There are also age-related features in permanent make-up of the eyelids, and, of course, the older our client is, the more indications there are for eyelid shading.
So, once one of my clients urged me to make her a fairly voluminous shading with color transitions from brown to olive green. At first, I was wary of this request, because at that time I had not seen such works from anyone. I understood that it was theoretically possible to fulfill such a desire of the client, but I had to follow all the rules and restrictions of the permanent in the eye area and took a chance ... This experiment turned out to be very successful. More and more people wanted to do just such a soft kind of permanent eye makeup.
All our clients are unique: they have their own eye color and shape, face type, appearance. And everyone needed something original. For some, shading in a single color was suitable, and the most daring ones trusted the master’s imagination, and we could create shadings in a combination of several colors. As it turned out, there are not so few brave clients, and then my experiments and observations started (within the rules of eye micropigmentation, of course). In addition, in my practice there was a lot of correction of previously done low-quality work on the eyelids, when only beautiful shading can save. Therefore, I practice beautiful creativity in the area of the eyelids for a long time. This is how my author's technique of multi-color permanent shading on the eyelids “colored mother-of-pearl” appeared.
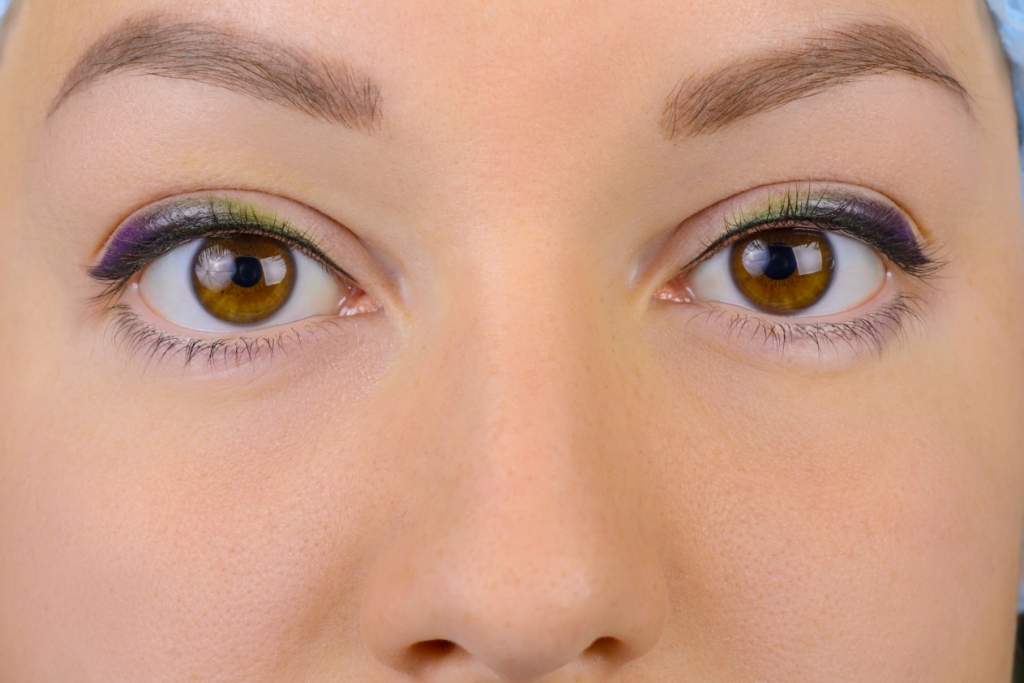
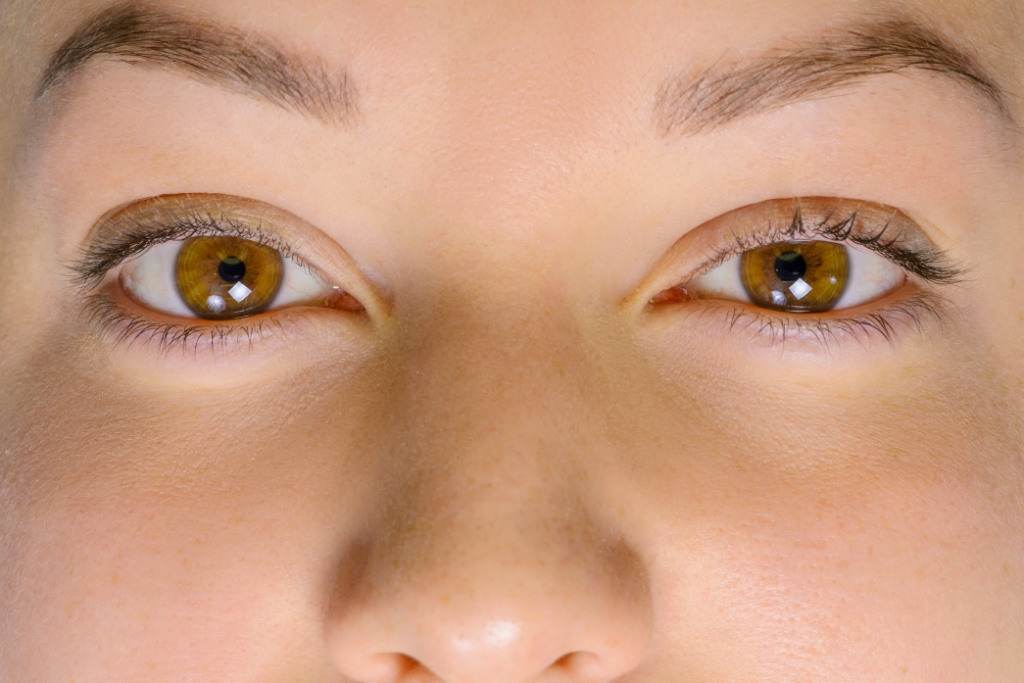
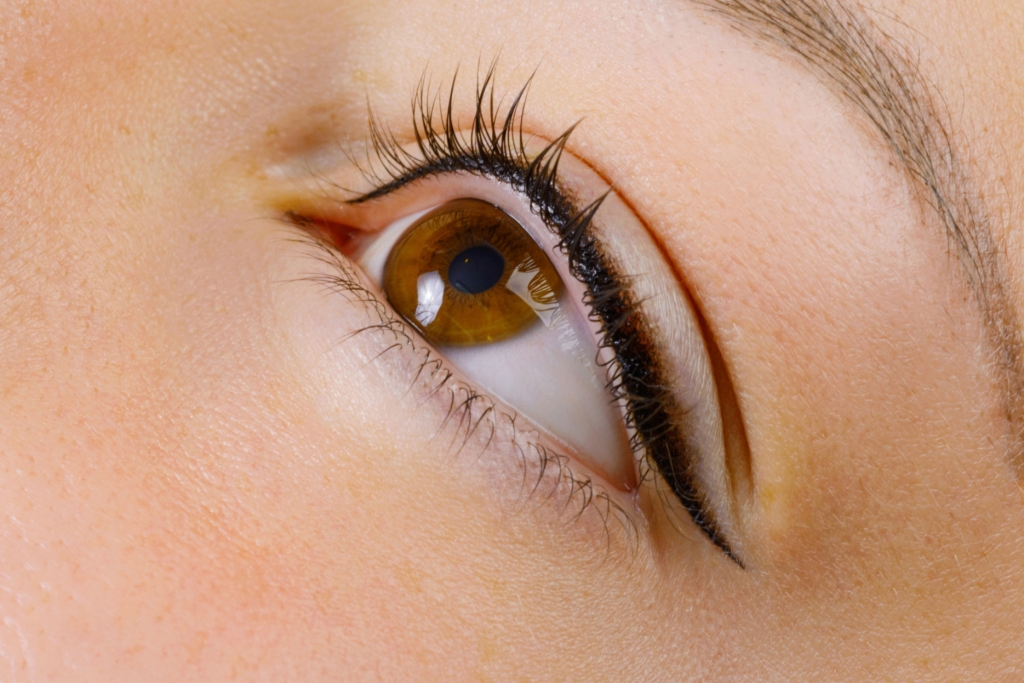
Before and after the procedure
Preparation for the procedure
In the performance of this technique, you can use absolutely any color combination of permanent makeup pigments in accordance with the color of the eyes and the type of appearance of the client, but be careful with color pigments. They tend to be dense in texture, especially light in color because they contain quite a lot of titanium dioxide (which, as you know, is very difficult to remove, especially in the eyelid area), and can become brighter over time. Given this, we can reduce the density of pigments by diluting them with the original diluent, but if suddenly it was not at hand, then sterile water for injection also works with a bang. As a rule, the darkest (dark brown or black) should be the base of our shading (the inter-ciliary contour and the exit of a small arrow): it is with the help of a correctly constructed base that the shape of the eye is created and corrected.
In order to show the client a preliminary final result, I always start the PM procedure with a sketch and use pencil colors that roughly match the intended pigment colors. The colors of the future shading should be combined with the color of the iris. It is necessary to follow the rules for the length and volume of the feather, so as not to make the base of the feather (arrows) too long, and also carefully think about creating beautiful and compatible color transitions and color stretching. Shading can have a very light character - be gentle and transparent, conveying only light shades of mother-of-pearl, or it can be quite dense and saturated, having a decorative look. Here, color transitions should be thought out to the smallest detail.
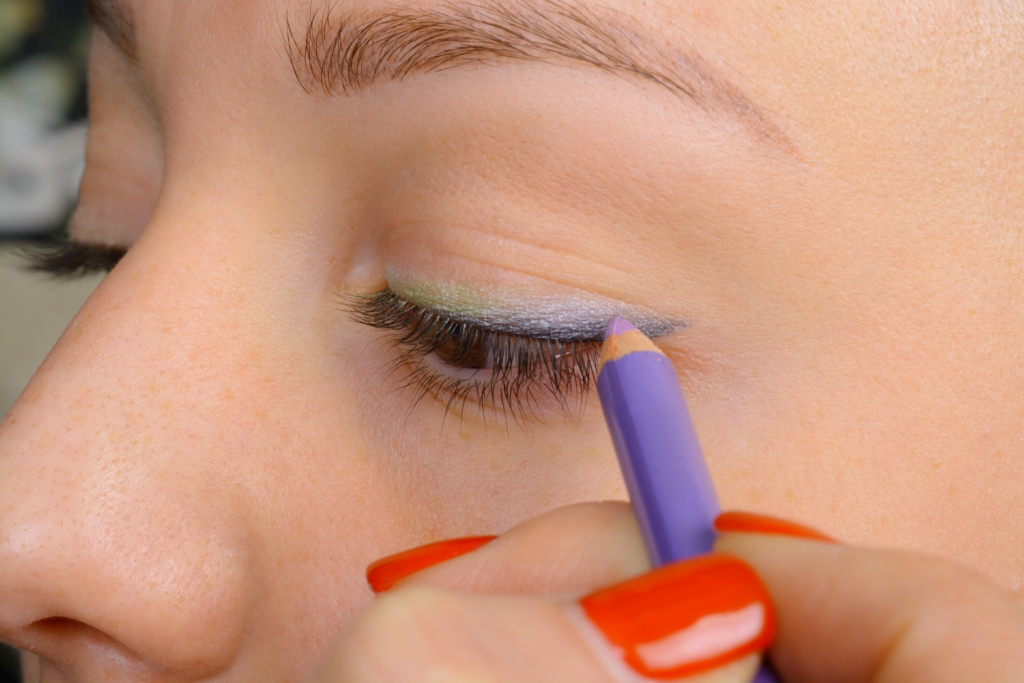
Drawing a sketch
Having finished the sketch and discussed all the details, as well as the features of healing, we get the confirmation of the client and proceed to the further main work - the implementation of the procedure itself.
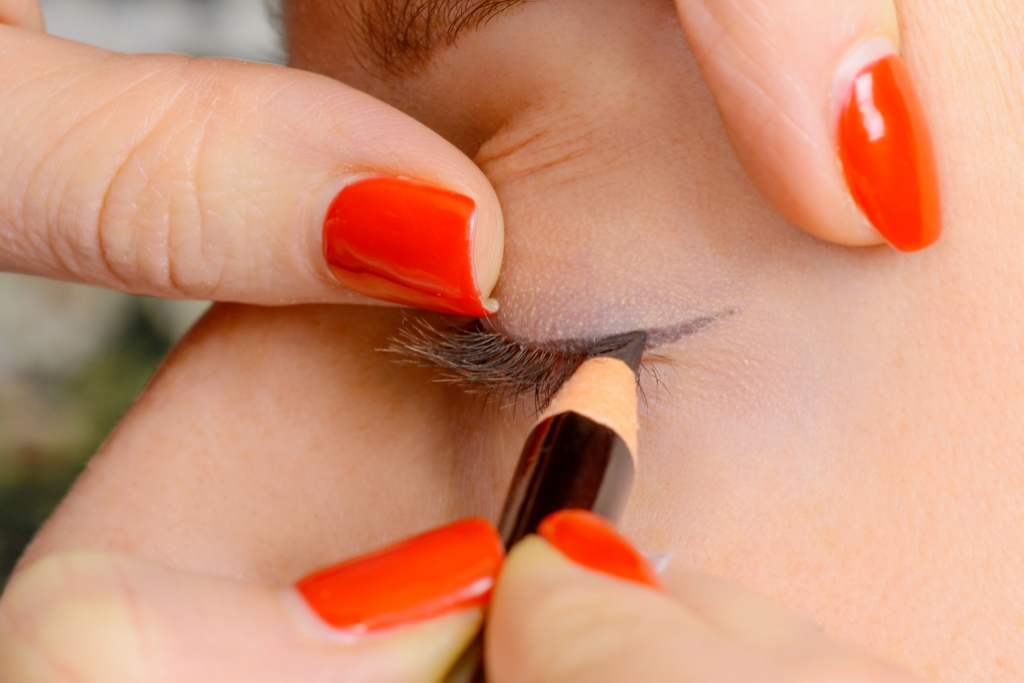
Stage 1: the foundation of the foundations
In order to avoid losing the sketch, after applying the primary anesthesia, I always fix the arrow exit (without anesthesia) at the outer corner with one pass of the needle with a dark pigment. As a rule, it is fast and not too painful, the client is able to endure, and thus you create comfortable conditions for yourself not to be mistaken in symmetry during the procedure.
Next, I carefully apply Mesonamb anesthesia on the upper eyelid and interciliary contour for 15–20 minutes. This anesthesia does not require occlusion.
I prepare the entire palette of planned pigments, needles and everything that will be needed during the procedure. In this case, we will use intense black, milky (almost white), yellow, light green, dark green, purple and dark magenta. I will use two modules: 3-slopped and 3-micro. I will use Sustain as a secondary anesthesia. The apparatus I use is Amiea Linnele Supreme (Germany).
So, let's start creating gentle beauty for the ages.
We wipe the anesthesia from one eye, and leave the other eye under the anesthetic. As always, we begin the procedure by drawing the contour of the eye, or rather, the intercilia and the exit of the arrow. For the dark base, I will use the 3-slopped module and intense black pigment. The frequency of punctures is average, 100 punctures per second. Where we have a thick line (in the middle of the eye), I draw with black pigment, keeping the needle flat so that all three needles draw. In the outer and inner corner of the eye, I turn the needle on the edge, and it performs the function of a unit, drawing clear thin lines. Next, we make a black stretch with “sweeping” movements with a needle in a plane so that all three needles draw horizontally. This is done so that there are no sharp color transitions between the contrasting black and color pigments. Next, apply a little Sustain secondary anesthesia to this eye and move on to the second eye, performing all the same steps to create a black shading base. As a rule, I work alternately with the eyelids, so that there is an opportunity for additional anesthesia and control of color saturation.
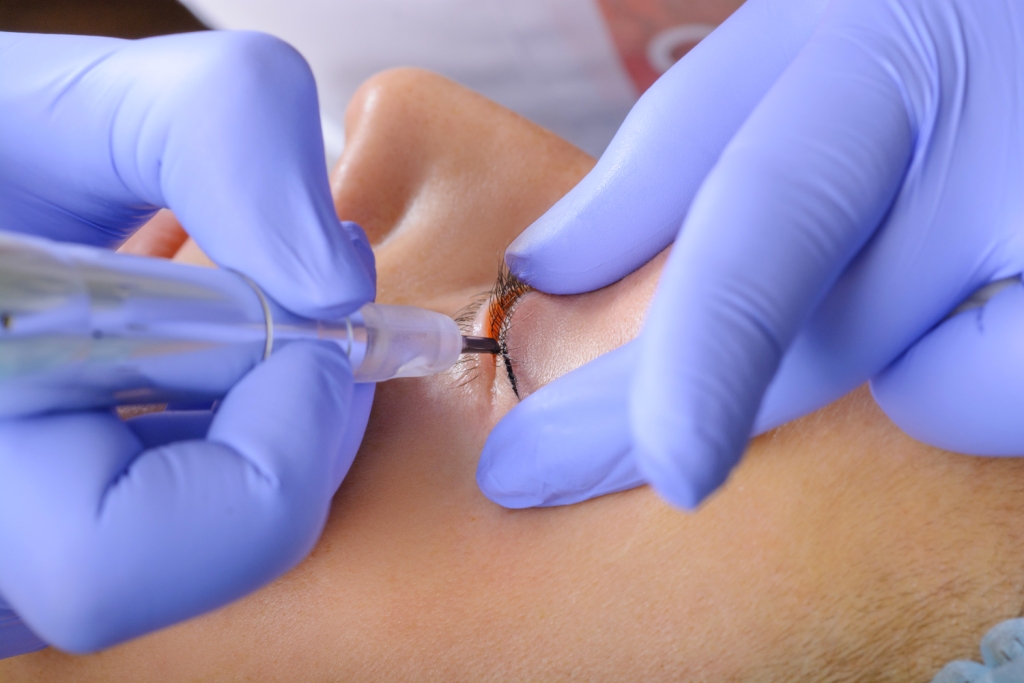
Drawing a dark base
Stage 2: color transitions
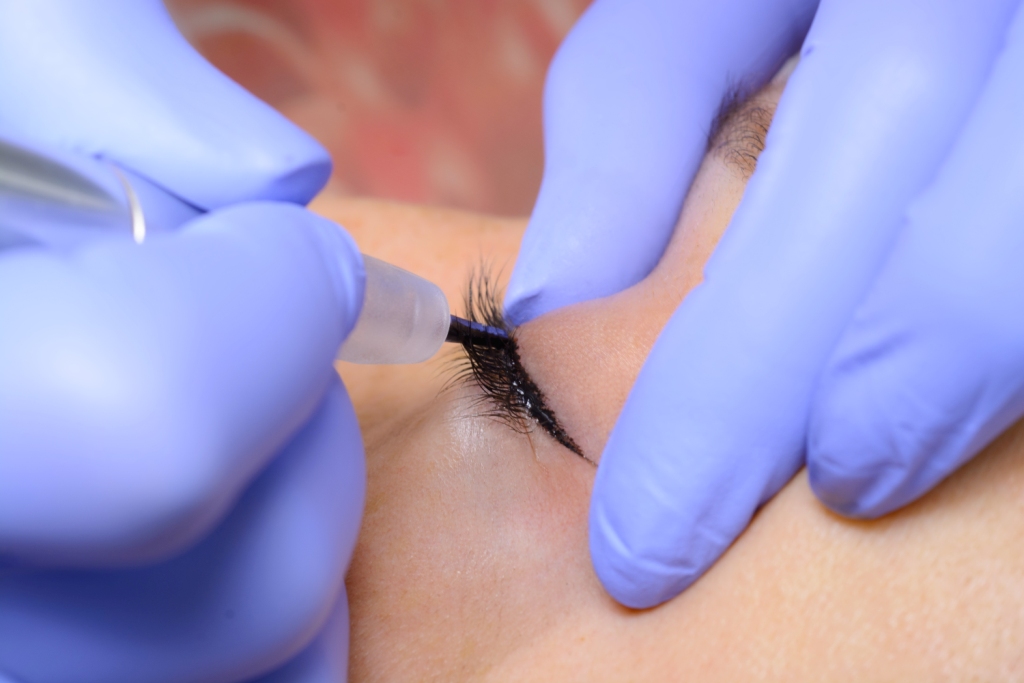
After finishing with the dark color and creating a beautiful base for my shading, I move on to another needle - 3-micro. I start working from the inner corner of the eye with the lightest color. As a rule, I always dilute the white very heavily (1:3) and work very quickly and very superficially to put a light veil of light color in the inner corner of the eye. You need quite a bit of light to give an open look. The frequency of punctures is still the same - average, 100 punctures per second, so as not to injure the skin too much and get a good color implant. With “sweeping” movements diagonally from the inner corner in the direction of the middle, we apply a stretch of color. At this pace, I will work through the entire procedure. Where it is necessary to make the color more dense and bright, I will place the strokes very close, and where it is necessary to create a transition from one color to another, I draw the strokes at a greater distance from each other and I will interweave another color into these gaps (see Fig. photo). We do the same on the second eye, alternately applying secondary anesthesia and controlling the saturation of each individual color on both eyelids.
After applying the white pigment, I turn to a light yellow color. The color is also quite dense, so I also add thinner in a 1:2 ratio (2 parts thinner and 1 part pigment). I weave it into a light color on the eyelids, gradually increasing the color transitions towards the middle of the eyelid. Imagine that your needle is a brush with which you stroke the eyelid from the inter-ciliary contour in the direction of the arrow in the outer corner of the eye. At the same time, do it at an average speed, slowly, but without stopping, in order to avoid stains. First, I put strokes of yellow on white at a small distance from each other, then I move into a dense zone of yellow, where the strokes are very close and then again sparse. Thus, we get the opportunity to make a beautiful transition to a new color.
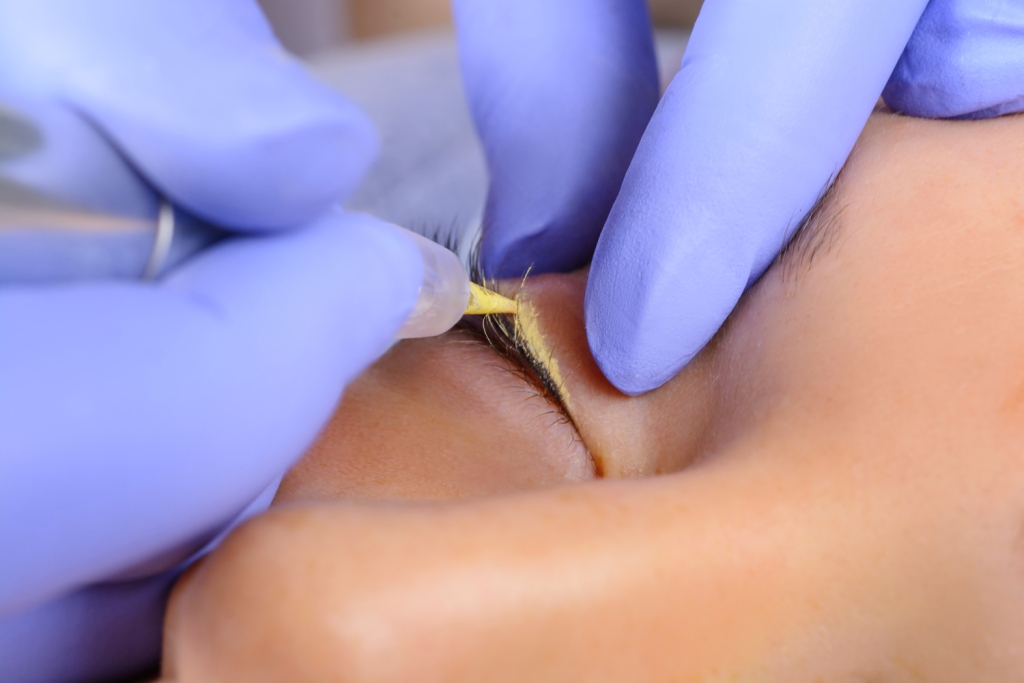

Application of light yellow pigment
The next color transition connector will be a light green pigment. I also work with them quite a bit, only making a smooth transition from yellow to dark green. Also, strokes of green are first drawn sparsely over yellow, then - quite a bit of a dense zone and again into sparseness. We do the same on another century.
The next color we have is dark green - we put it on green with rare strokes, then - densely and again rare. From dark green, I will make the transition to my favorite purple color, so it's important not to darken or stain! We work very gently on the eyes, as if stroking with a brush.

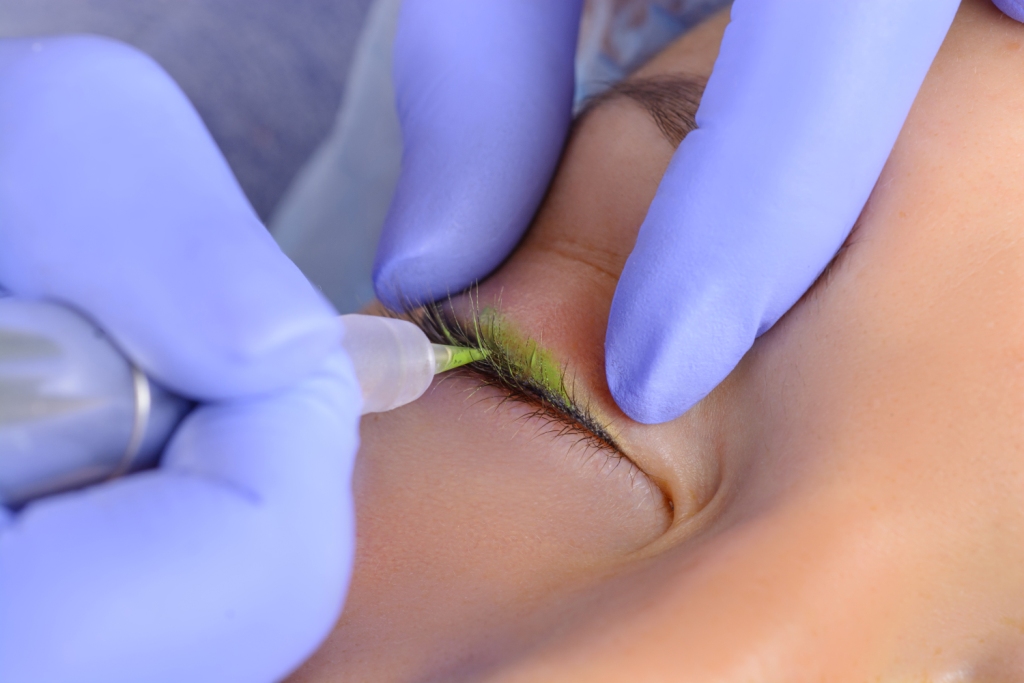
Change from yellow to dark green pigment
So, between the strokes of dark green we interweave strokes of purple, then we apply them more and more often and denser in the direction of the arrow. It is important to perform the “sweeping” movement correctly - smoothly enter the skin with a needle and exit smoothly, thereby creating a color gradient from dense and bright to translucent. Purple is a rather difficult color to apply, so take your time, the stretch should be uniform.
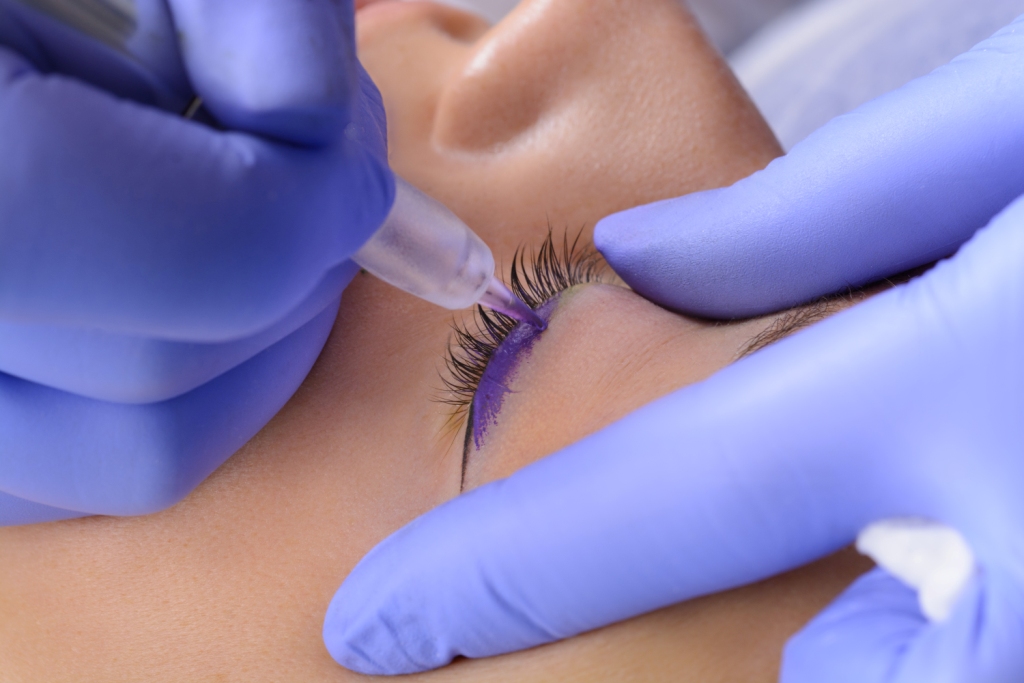

Transition to purple
Stage 3: completion of the procedure
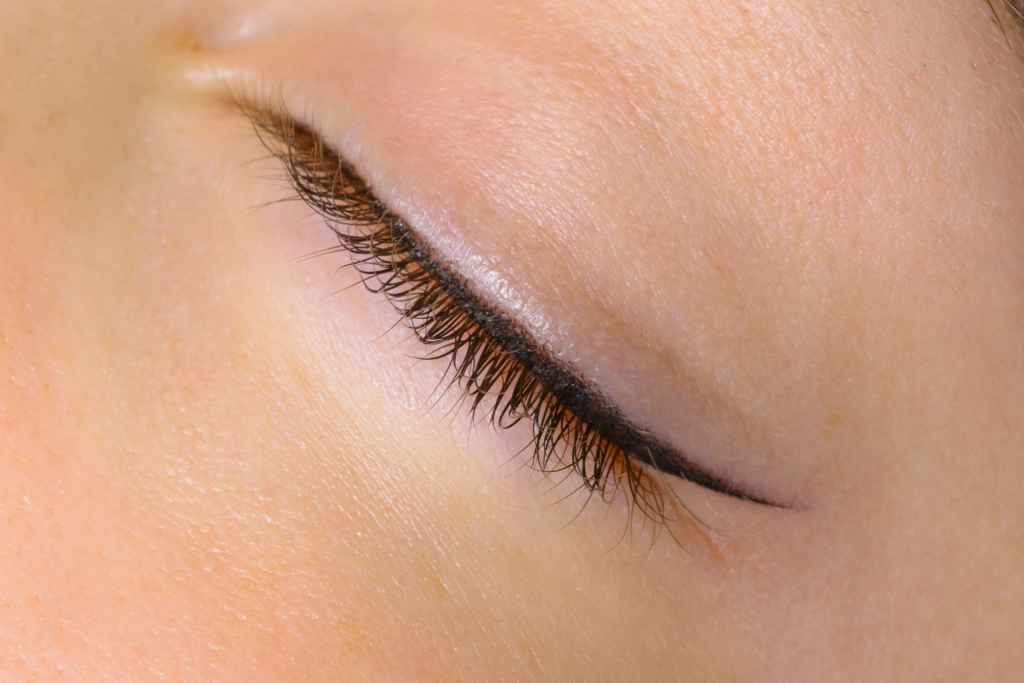
The last, final color is dark purple, it connects the purple and black base of the shading, and also completes the pattern in the outer corner of the eye. This is the darkest area. We apply strokes of purple at a small distance from each other, weaving it into purple, and go into a dense application, stretching the color up in the direction of the arrow. The end of the shading should be very gentle, despite the fact that we have dark color transitions. In conclusion, we once again check the density and volume of the shade of each color sector and the clarity of the dark base along the line of the interlash and the exit of the main line of the arrow.
At the end of the procedure, I always put “natural tear” drops into the client’s eyes and lubricate the shading area with hydrocortisone eye ointment (a single application is enough).
As for post-procedure care, I advise clients not to wet their eyes, do not steam their face, do not apply decorative cosmetics to the eyelids during the healing period, do not scratch or peel off the crusts. I prefer when the eyes heal “dry”, but if the client experiences discomfort and tightness on the eyelids (after all, the shading is quite voluminous), as the discomfort increases, the shading area can be moistened with Vaseline with vitamins A and E in a very thin, almost imperceptible layer.

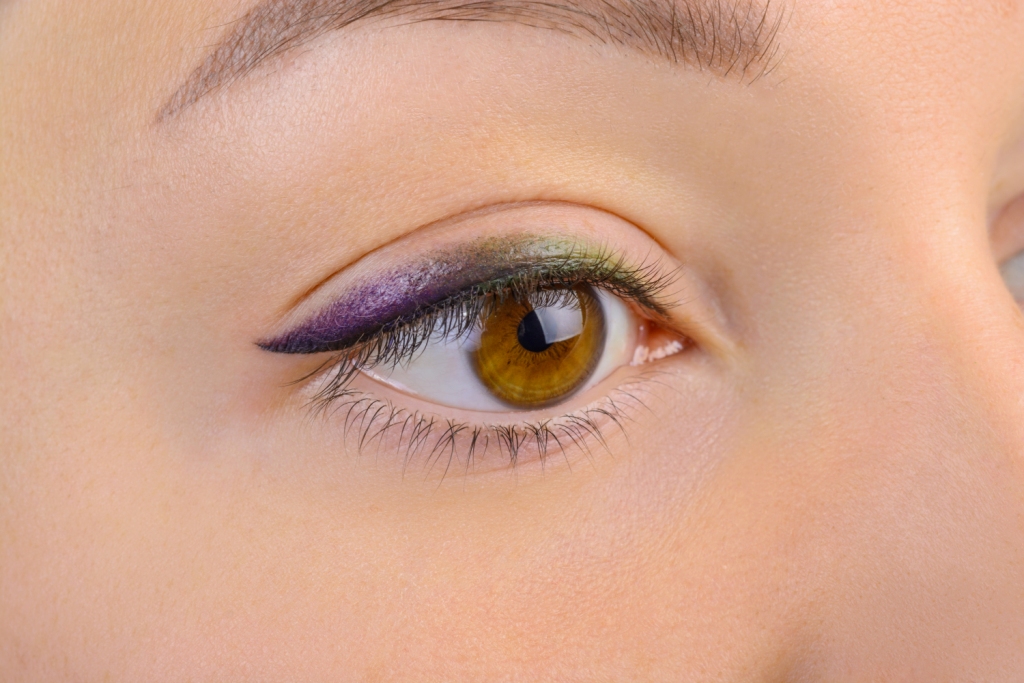
Complete healing occurs within 40 days. Depending on the colors chosen, it is possible that the result will be light after healing, as opposed to the result immediately after the procedure. After the correction, as a rule, the work is considered complete and sufficient in saturation, while the colors are not flashy, but, on the contrary, delicate, pastel.
PS Before embarking on such complex types of shading on the eyelids of clients, I strongly advise you to practice on paper, armed with colored pencils. Next, try to perform a similar procedure on synthetic leather (latex) and, if you get decent results - without spots and with beautiful transitions, go to the faces. The eyelid area is a serious, sensitive area with thin skin. Mistakes are very easy to make here, while most color pigments cannot be removed, so be extremely careful and attentive!
I wish you creative success and self-satisfaction from the excellent results of your work!